Photographs are ways of communication. We see lots of photographs in our everyday lives. A photograph should be neat and clean. Only them you can get appreciation from the people and that will also help you to boost the conversion rate. A photo having spots, blemishes and unwanted object makes the photo look awkward and undesirable. Sometimes it becomes difficult to change the photography. Photo editing is actually the magic wand behind changing your whole photography. If you see a photo and you feel there is an unwanted object. You can remove unwanted object from your photo by editing the photo by the help of Photoshop.
There are different tools of Photoshop work in many different ways to do many editing things. To remove unwanted piece of stuff from your photo, you can use different tools such as healing brush tool, spot healing brush tool, patch tool, red eye tool, blur tool etc. But patch tool and healing brush tool work the best to get rid of the unwanted object.
![]()
Here are the methods of removing unwanted object from your photographs
Remove Unwanted Object with Patch Tool
Patch tool of Photoshop is one of the finest tools by which you can erase an object from a photo really very easily. Many of the professional photo editors use the patch tool of Photoshop to remove an object from the photo. Do you want to remove an unwanted object of your photograph by your own?
Here I am showing you an easy step-by-step process of removing an unwanted object using Patch Tool.
Open the Photo
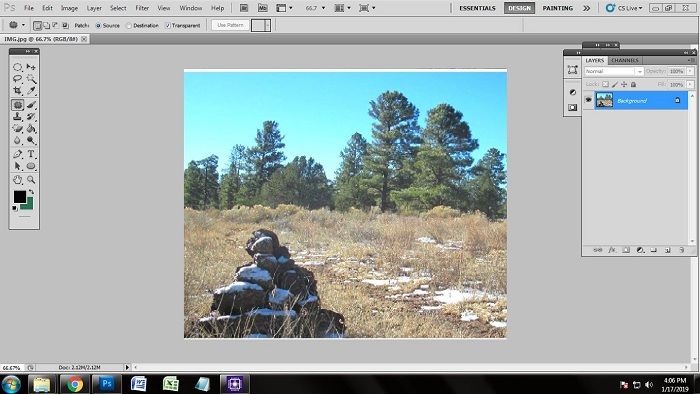
The first thing to edit the photo, we need one photo editing application. Here, we have selected Photoshop to remove the unwanted object from the photo. To edit the photo, at first we have to open the photo in Photoshop.
There are 2 ways of opening the photo in Photoshop. One is manual and other is automatic. To open the photo, you can go to File>Open, you will get a windows dialogue box. Go to the file location and click on the file. Press ok to open the photo. The photo will be opened in Photoshop.
You can also open the photo just by dragging the photo into Photoshop. Go to file location and drag the photo in Photoshop bar. Doing that, the photo will be opened in Photoshop within a second. I have opened the photo automatically by just dragging. It is time saving.
Objectify the Object
After opening the photo in Photoshop, you need to be sure which object you want to remove from the photo. You need to objectify the object. I want to full scenery to here. But the stones in the left are actually restricting the photo and does not like by me. I have chosen the stones to get removed from this photo.

Select Patch Tool and Draw the Line
No matter what photo editing we do, we need to apply tools to edit photos in Photoshop. There are some specific tools for background removal retouching, color correction etc. Likewise, there are some tools in Photoshop which works best to remove unwanted object from a photograph.
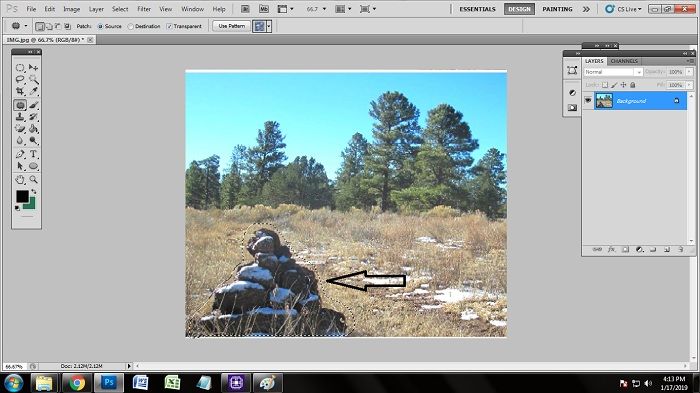
Here, we are going to select patch tool. Patch tool actually is a very smart tool. It knows the context and content. So we are selecting the patch tool. Go to the tool bar and right click on the brush tool. Doing that, you will get a box containing several other tools. Click on the patch tool from there. Patch tool will be activated by doing that. After activating the patch tool, we need to draw the line over the stones. No, we are not doing Clipping Path. We will just draw the line by patch tool around the stone area. The area will be selected right after drawing the line.
Select Fill
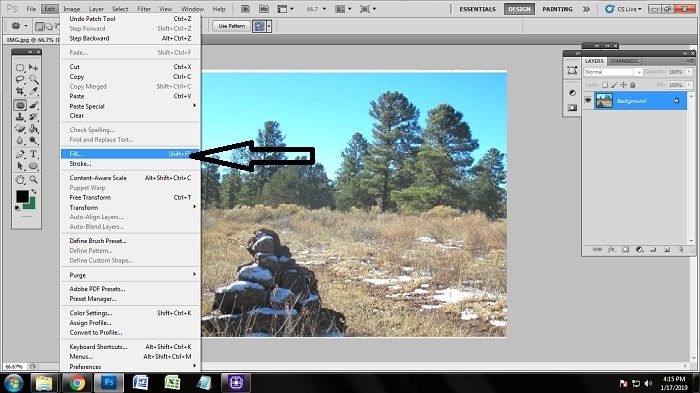
As we have drawn the line over the stone areas, the patch tool has already detected the content and context of the area. Now it really knows what to fill in the stone area. To remove the objects, we need to get the fill box. To do that, go to Edit>Fill. Doing that you will get a dialogue box.
Select Content
After clicking on the fill, you will get a dialogue box where the contents will be containing. You will see a something written ‘use’ clicking that, you will get more several options. Click on Content-Aware from the options. Content-Aware option helps you to fill the place of the unwanted object by the surrounding of the other area of the image. It knows what to fill. From the down, there are other 2 boxes named mode and opacity. Select normal mode and set the opacity to 100%
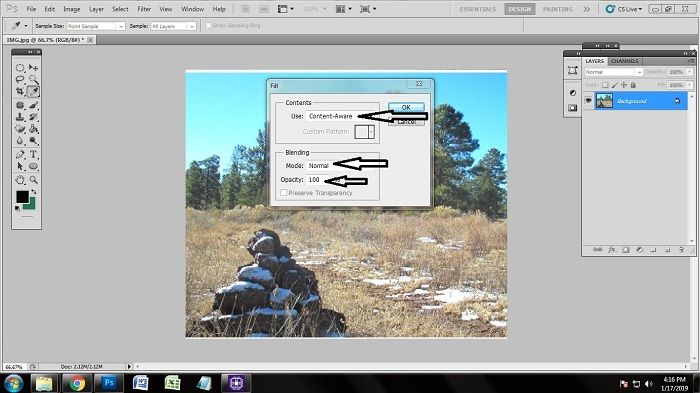
Press OK
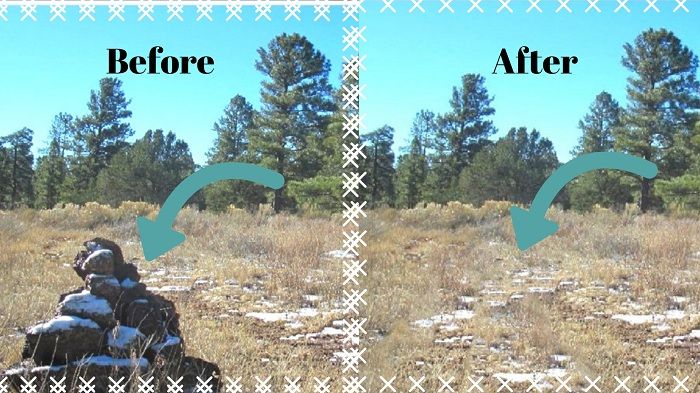
After adjusting all the things of contents, click on okay. Or you can also press enter on keyboard. Doing that, you will see that the unwanted object is removed.

Here is the photo after removing the unwanted object.
Remove Unwanted Object with Healing Brush Tool
To remove the unwanted object from a photograph, healing brush tool plays a very important role. It is a very popular tool to perform any kind of retouching. It helps to remove spots, blemishes and also unwanted objects perfectly. This is used by almost every professional photo retouchers.
Here I’m showing a step-by-step technique of removing an unwanted object using Photoshop healing brush tool
Open the Photo
To remove the unwanted object using healing brush tool, we need to open the required photo in Photoshop. To open the photo in Photoshop, we are going to apply the same technique which we applied to open the photo in previous method. So open the photo using any of the technique. Manual or automatic, it’s your choice.
Select Healing Brush Tool
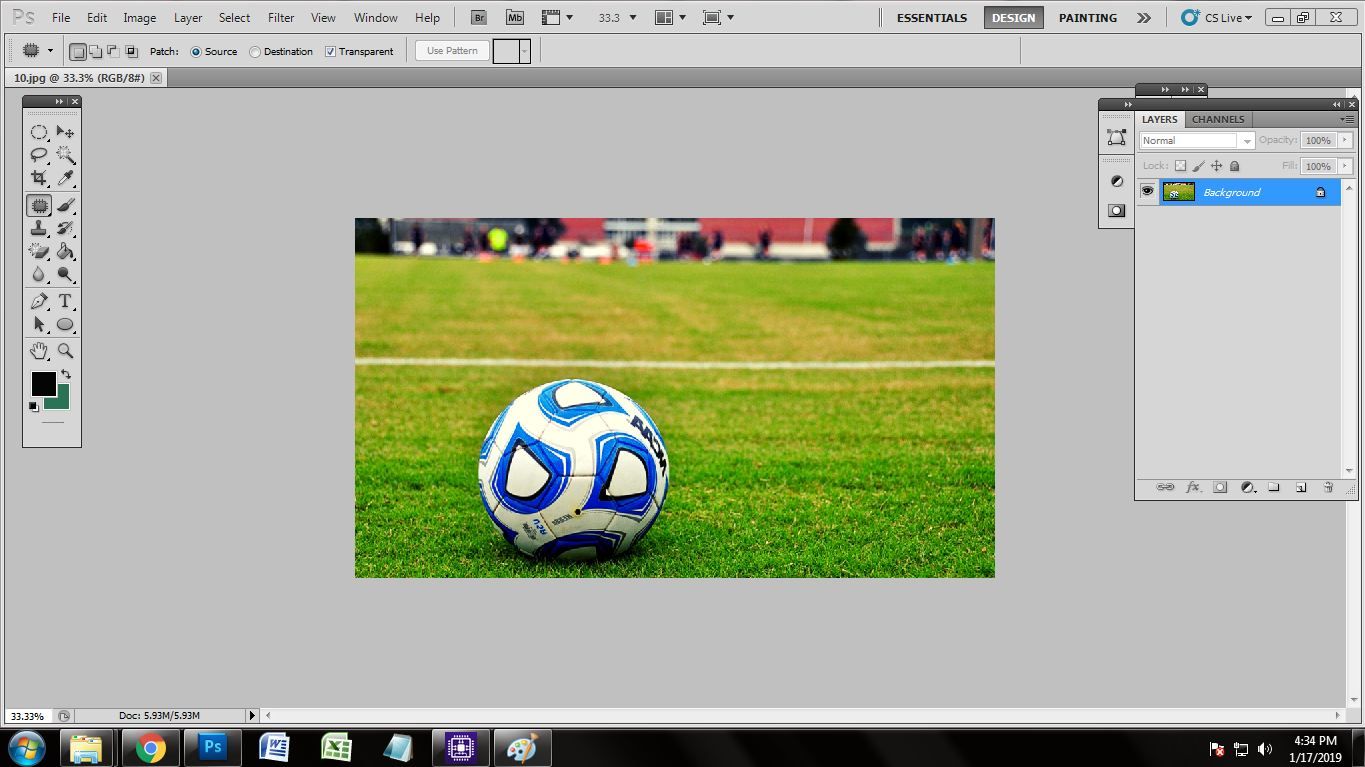
Healing brush tool is one of the best tools of retouching. People who know how to do retouching, they use healing brush mostly to retouch the photo. Healing brush tool works best to remove spots, blemishes and unwanted objects from a photograph. So we are going to select healing brush tool to remove unwanted object from this photograph. Go to the tool bar and click on the healing brush tool. Clicking that, the healing brush tool will be opened automatically.

Adjust the Radiance
As we have selected the healing brush tool, we need to adjust the radiance/amount and the size of the healing brush tool. After activating the healing brush tool, you will get to see a circular icon on the screen. If you right click on the mouse, you will get a box containing size, hardness and spacing. From the sliders, you can adjust the radiance, amount and the size of the healing brush tool. Click on the screen again when you have finished adjusting the radiance.

Rub the Healing Brush Tool
Now we are on the climax of removing the unwanted object. As we have already adjusted the radiance of the healing brush tool, we are going to work on the photo now. Press Alter on keyboard and click on the area of the photo you want to cover over the unwanted object. Now rub the area of unwanted object with the help of healing brush tool. Keep rubbing until you get the unwanted object removed properly.

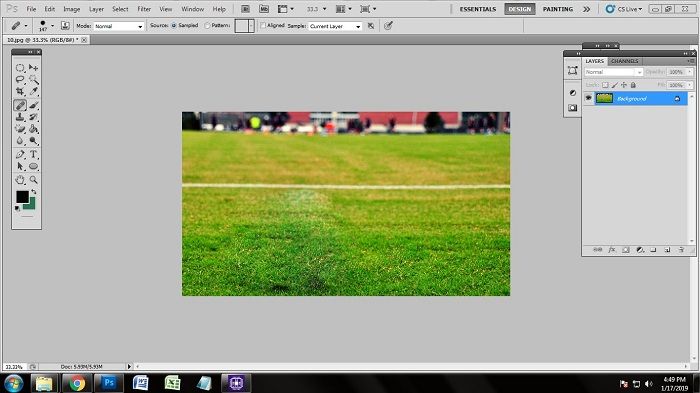
Here is the final look after removing the unwanted object using healing brush tool.
Conclusion
Photo retouching is not that easy to do. If you do not know the uses of the application and the tools, you will not be able to make that happen efficiently. Almost every photo editing company that provide clipping path services and which have some great professionals, they also use these tools to remove unwanted objects from a photograph. It is your chance to edit photo and erase undesired object from your photo and perform like a professional.


