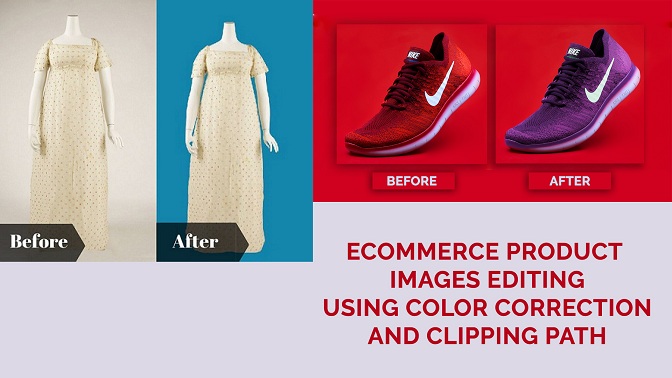
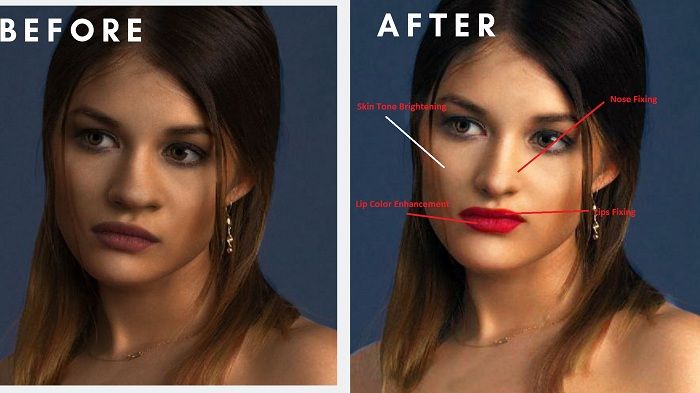
Most of the eCommerce sites are hiring product photographers to take pictures of their products. They are hiring photographers so that they can increase their sales through stunning photographs. But one thing that isn’t in their mind is that a simple technique of photo editing can actually help them deliver great engaging product images to their clients or eCommerce businesses. Some dominating ecommerce businesses are outsourcing such e-commerce product photo editing services from photo editing companies. But if you want to do it yourself then this is the article you should read.
There in this article I’ll show two unique photo editing techniques like color correction and clipping path for eCommerce product images editing.
Color Correction of E commerce Product Image
Open image
The first step is to open the image of the product on Photoshop. There are two ways for doing this. The first way is to go to file>Open and select the image you want to edit from your folder. The next way is to press Ctrl+O and then choose the image from the folder.
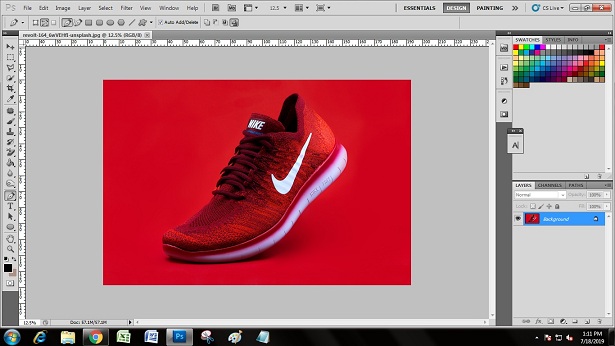
Take a Path layer
To select the object from the background and change the color of it, you will need to draw a path over it. To draw a path and to keep it saved you will need to create a new path layer. This layer will help you edit the selected area as many times as you want. The path you will draw once will be saved for reuse. To take a path layer go to the path tab and click on that page icon at the bottom. This will create a new path layer to draw path on.
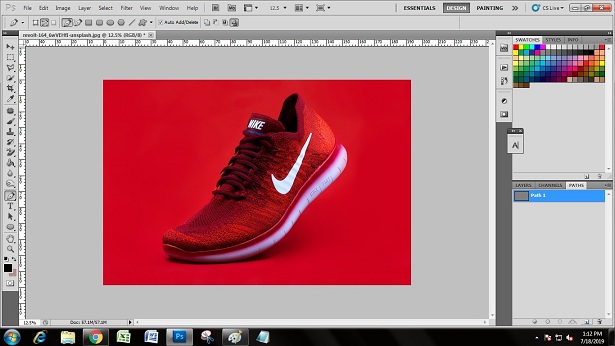
Choose Pen tool
To draw anything you need a pen or pencil right? Same here you will need a tool called pen tool to draw path over the product. You can find the pen tool on the toolbar it has an icon of an old styled ink pen. You can also click “P” to activate the pen tool.
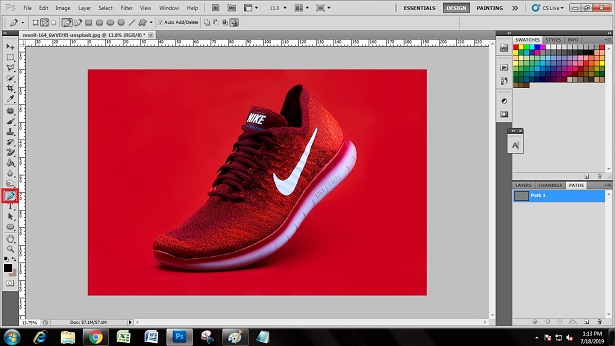
Draw path
Now you have a path layer as well as a pen tool. Your weapon is ready now all you have to do is to learn how to use them properly. You will have to click on one point of the product’s outline then by creating anchor points using your mouse keep drawing path over it. When you have drawn paths all over the object connect the last anchor point with the first one and you will have a path drawn around your product’s outer lines. You can also outsource clipping path from experts like us if you want to save time and money.
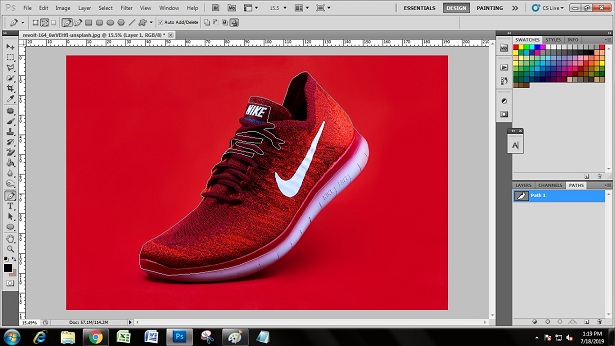
Make selection
After drawing the path you will need to select the area. A selection will help you alter the selected area in any way you want to. To select the path you will have to right click on the path on the image and choose make selection option from the menu. This will select the path area from the whole image.
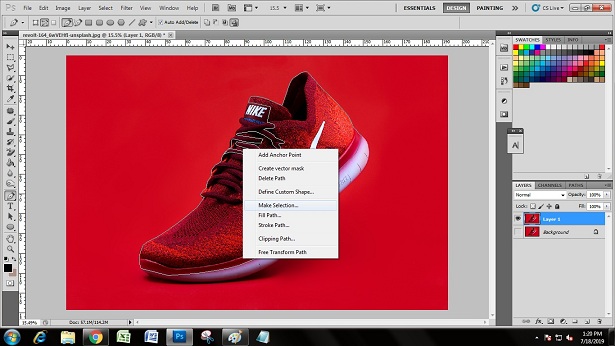
Hue and Saturation layer
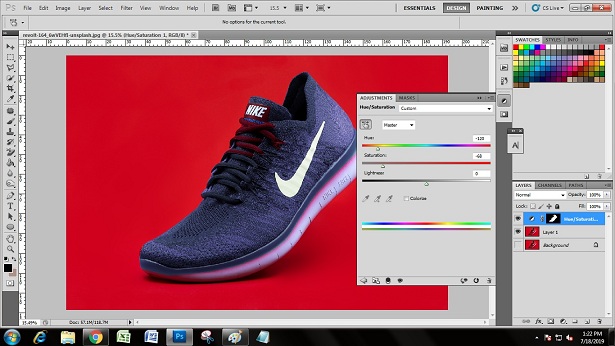
To change the color of the product you’ll need to adjust the saturation and hue using adjustment layer. This adjustment layer is called the hue and saturation layer. To activate this layer you will need to go to the adjustment layer menu from the bottom of layer tab then choose the hue and saturation option. Then you can change the color.
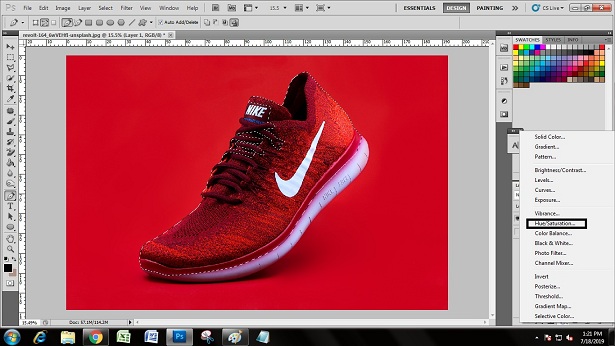
Adjust Hue and Saturation
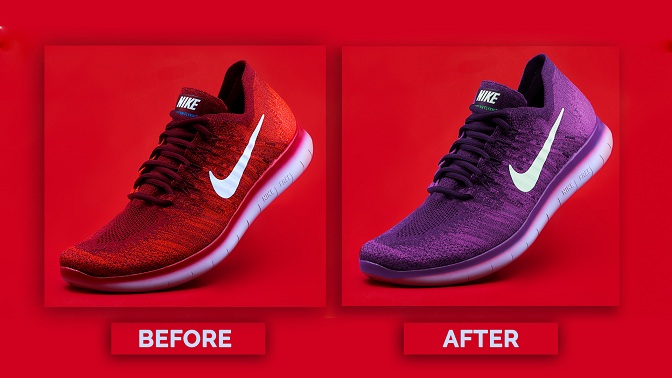
Now you can adjust color of the product by moving the sliders. Adjust hue to find the color you want and adjust saturation to control the quantity of color you want. This way you can change the color of your product image using color correction.
Here is a before and after image of color correction ecommerce product –
Background Removal of E commerce Product Image
Open the Photo
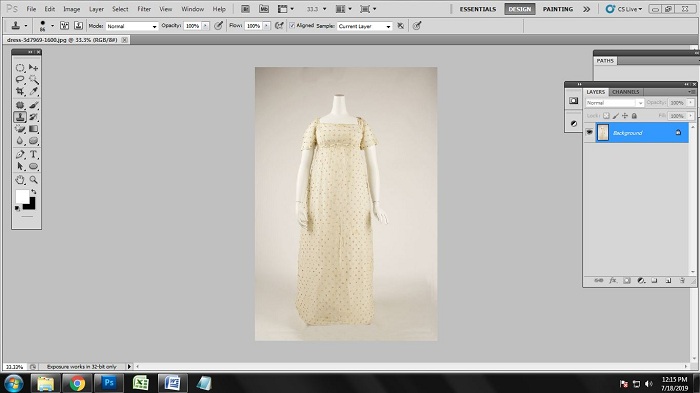
To remove a background in Photoshop, you need to open the photo at first. This is the first step of working in Photoshop anyway. So, for removing background, we need to open the photo in Photoshop at first. There are actually 2 different ways of opening or importing the photo in Photoshop.
The first way is, Open the Photoshop app. Click on File>Open. Doing that, you will get a dialogue box of windows. Go to the location where you have your required photo for editing. Click on the photo and press enter or click on OK. The photo will appear on the screen. The other way or importing a photo in Photoshop is way easier. You just need to go to windows and the file location. Drag the photo in the Photoshop bar and the photo will be opened in Photoshop. That is how we have imported the photo to start working.
Select Pen Tool
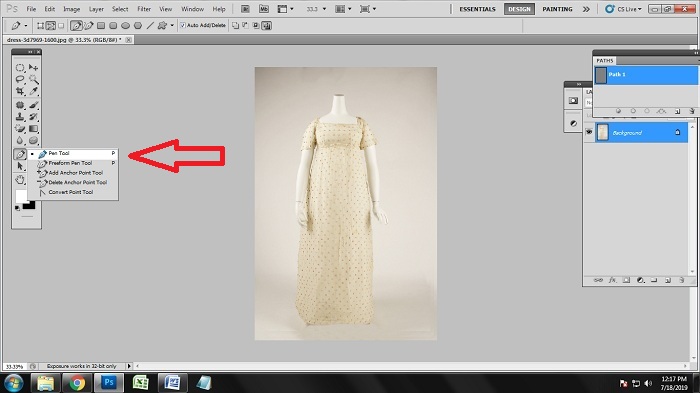
There are different tools in Photoshop which work in different ways for different photo editing. In fact, there are multiple tools for background removal too. But the best tool for removing the background is the pen tool. Pen tool of Photoshop is unfathomably used to draw a clipping path. It is an entirely adaptable tool which you can control as the manner in which you need to. The greatest number of the photograph editors who work with Photoshop lean toward pen instrument to draw clipping path over the picture and to expel the foundation. Go to the tool bar and click on the pen icon to activate the pen tool. You can also activate the pen tool by simply pressing ‘p’ on the keyboard.
Draw Clipping Path
Background removal is a technical thing in photo editing. Clipping path is a background removal method which is utilized by the vast majority of the creators to expel the background from a picture. We will apply cutting way strategy on the human jpg picture we need to expel the background of. Take ‘way’ layer and work on the way layer. Put the grapple focuses according to the shape. Break the stay focuses by squeezing ‘alt’ where you can see a few rounds or various shapes. Close the section way with the stay focuses from the spot we have begun. This will help you to keep the shape of the eCommerce product untouched and accurate. Creating clipping path s a time consuming work this is why most of the businesses outsource clipping path service from various companies.
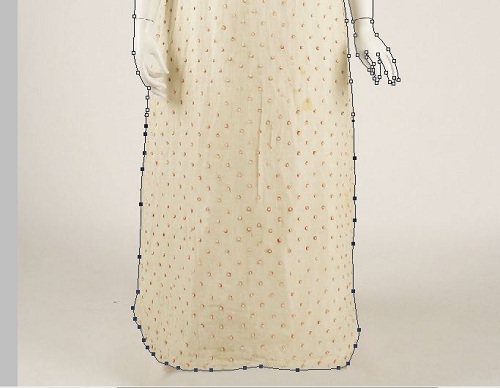
Make the Selection
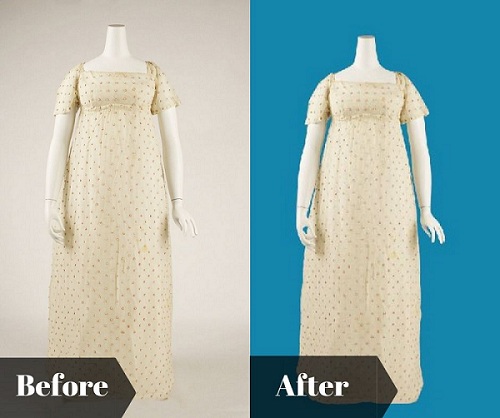
After creating the clipping path over the dress eCommerce photo, you need to make the selection of the dress photo. Without making the selection, you will not be able to remove the background of the image. To make the selection, click on the path layer we are working on. Press ‘Ctrl+enter’ together to make the selection. After doing that, you will see many dots are moving around your product image. This indicates that the parts you wanted to select are selected.
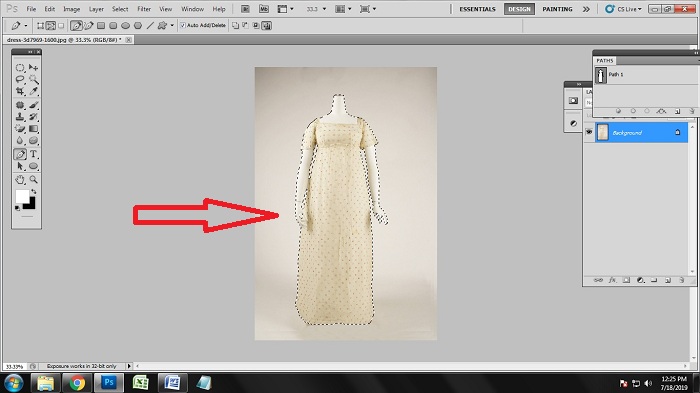
Go to Quick Mask Option
Now that we have made the selection, it is time for us to select the new background color we want to put as a new background. For that we need to go to the quick mask option. Go to the tool bar and click on the icon in the down which is quick mask option. Clicking there, you will get a dialogue box including many colors. Choose your required color and click on OK.
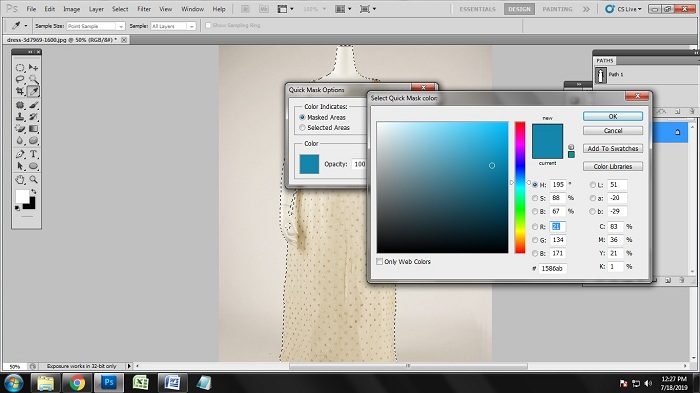
To remove the background, press ‘q’ on the keyboard and the color of the background will automatically get removed and changed.
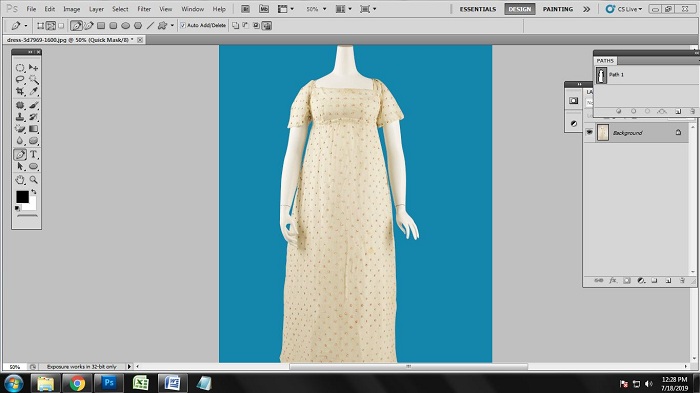
Here is the photo before and after removing the background of the eCommerce photo using background removal technique.
Conclusion
Here are the two most taken photo editing techniques wanted by most of the eCommerce companies we have spoken about. Almost every eCommerce company takes the help of ecommerce product photo editing services to get background removal and color correction services. Going for these services, you will get to improve the quality of your eCommerce photos and can boost the conversion rate as well. These techniques are simple and you can do these by yourself anytime you want to.

