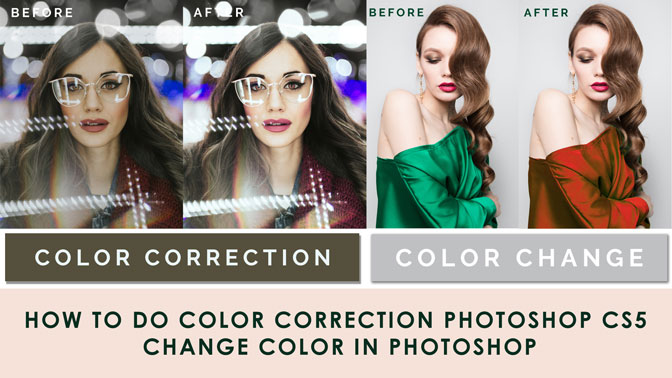
Many photographers nowadays want to change the color of anything of a photo. Then there are some other photographers who want to correct the colors of an image. Most of such photographers rely on Photoshop for doing such edits.
It is fairly easy for professional photographers to edit photos. But, for some beginners, it becomes quite tough and they don’t know where to start from. So for such enthusiasts, I’ve made this short tutorial type article which shows how to do proper color correction of an image or change the color of particular objects in the image.
You can also check these articles for more ideas about color correction –
How to Change Dress Color in Photoshop
Color Correction with Photoshop in 5 Easy Steps
Now without wasting more time here let’s start the tutorial!
Change dress color using Photoshop cs5
Many e-commerce businesses hire designers to do this kind of editing. This is quite easy and can be done in a few minutes. These are the steps –
Open the image –
First thing as always is to open the image you want to edit on Photoshop. For that, you can either go to File>Open and open the image or you can drag and drop it on the canvas. I prefer the drag and drop as it saves time.
![]()
Take a hue and saturation layer –
There are some layers in Photoshop which can be used to edit an image without destructing the actual image these layers are known as adjustment layers. In this process, we’ll also use an adjustment layer known as hue and saturation layer. This layer will help us to change the color of the object. To activate this adjustment layer go to the layer tab and click on the circle icon at the bottom. It looks like two semi-circles with one colored black and the other white joined together. Click on this icon and choose the hue and saturation option from the list of adjustment layers.
![]()
Click on the saturation modify button –
After you choose the hue and saturation layer, you will get a tab which has three sliders. On slider is the hue other is saturation and the last one is lightness. We will use it to change the color of the dress in the image. First, we’ll need to choose or select the area of the image which has the dress. To do so we’ll need to use the color picker tool that gets automatically activated when you take a hue and saturation layer. We can use it to take a sample of the dress color from the image. Before taking a sample you’ll need to click on the hand icon with two arrows one directing right and the other on the left. You can find this icon on the top left of the hue and saturation tab. Click on this icon it will enable the function of saturation modification.
![]()
Pick up the color of the dress –
Next thing is to pick up the color of the dress that we are going to change using the color picker tool or you can call it the saturation modification tool. Click on any point of the dress. This tool will select the area of the dress from the image which will help you adjust the color properly.
![]()
Adjust the Hue and saturation –
The last step is to adjust the hue, saturation, and lightness. The hue will change the color of the dress. The saturation will control the amount of color and the lightness will help you adjust the amount of the color’s brightness and shadow. Using these three sliders adjust the color of the dress according to the color you want. After changing the color press Ctrl+Shift+S. It will save the file as a JPEG or PNG.

Here is the before and after look of the image –
![]()
Color correction using adjustment layers
Many professional photographers use this technique to correct the colors of the images they’ve captured. It retouches the image and makes them look more flattering and attractive. These are the steps for this type of color correction –
If you like to get the budget of your project, you can use our Get a Quote form.
Open the image –
As I’ve told you on the color-changing technique above, you can do the same here which is you can either open the image in Photoshop using File>open or drag and drop it.
![]()
Choose Selective color layer –
For this type of color correction technique, you’ll need to adjust the colors present in the image first. To adjust the number of colors present in the image the use of selective color adjustment layer is compulsory. To activate the selective color layer click on the adjustment layers button and choose a selective color from it.

Red color adjustment –
From the selective color adjustment layer, tab clicks on the color menu and choose red. Using the sliders adjust the amount of red color present in the image.
![]()
Yellow color adjustment –
From the selective color adjustment layer, tab clicks on the color menu and choose yellow. Using the sliders adjust the amount of yellow color present in the image.
![]()
Blue color adjustment –
From the selective color adjustment layer, tab clicks on the color menu and choose blue. Using the sliders adjust the amount of blue color present in the image.
![]()
White color adjustment –
From the selective color adjustment layer, tab clicks on the color menu and choose white. Using the sliders adjust the amount of white color present in the image.
![]()
Take a Hue and Saturation layer –
After adjusting the amount of color present in the image adjust the quantity of the overall color of the image using the Hue and saturation layer. To activate the layer click on the adjustment layers button and choose Hue and saturation.
![]()
Adjust the Hue and saturation –
Now adjust the saturation of the image doesn’t change the hue. Changing the hue will destroy it. Then adjust the lightness a little bit. It will keep the colors gentle.
![]()
Take a Brightness and contrast layer –
Now you will be able to give a magic touch to the image using a brightness and contrast layer. This layer will pop the colors perfectly. To avail, this layer clicks on the adjustment layer option and choose brightness and contrast.
![]()
Adjust the Brightness and contrast –
First of keep increasing the contrast so that bright colors and dark colors become even. Then simply increase the brightness and you’ll see the magic that how the color pops up so perfectly. Then save the file after you’re done editing.
![]()
Here is the before and after image –
![]()
Conclusion
These are the easiest ways to do color correction or Change color in Photoshop to your images and make them more engaging. Become a pro in this technique by practicing it on all of your images. Adjustment layers are the best tools to do any kind of photo retouching. So master the skills using Photoshop and do the color correction with ease.
Reference –
Advanced Color Correction & White Balance in Photoshop CC
Change the Color of a Dress with Photoshop CC


