One of the coolest things about Photoshop is that you can do miracles using it. You can make a person fly, change faces or swap face using Photoshop and you can also create a fake motion trail effect to the photo to make the picture look like its moving. This is what we’ll see today how to make a picture look like its moving?
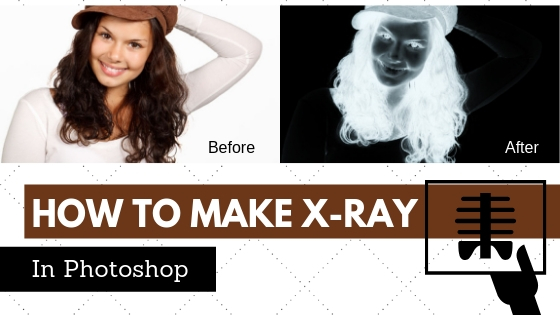
These unique things you can do with Photoshop are known as the image manipulation technique. Anyone can manipulate images to make it look different. Some image manipulation or clipping path techniques like make X-ray using Photoshop is easy to do but some manipulation techniques like changing eye color in Photoshop are pretty difficult.
Well in this article I’ll show you the easiest way on how to make a picture look like its moving using a Photoshop manipulation technique known as the motion trail effect. Hopefully, you will understand it properly and can also do it all by yourself.
So without further adieu, let’s start!
Clipping Path Experts offers Different types of Photo editing services at the cheapest rates. You can check them now!
Steps to make a picture look like it’s moving –
Open photo
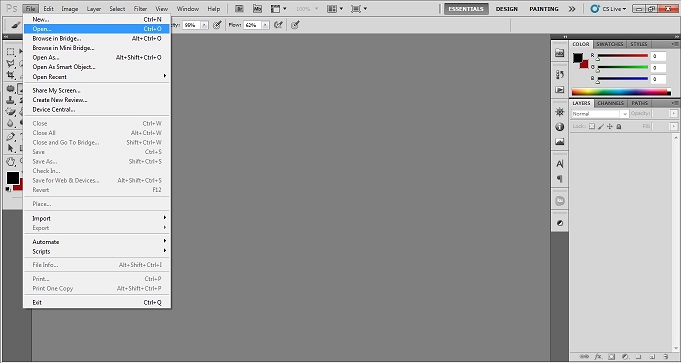
To do photo editing, you need to open the photo in any of the app or editor you are using. We are going to use Adobe Photoshop CS5 here to edit photo. At first, we need to open the photo. There are two ways of opening/importing photo in Photoshop. You can simple go to File>Open on Photoshop CS5. Doing that, a box of windows will be opened. Go to your required file location and click on your required photo. Click on open or press enter on key board. The photo will be opened in Photoshop.
You can also apply another easy method. Go to the windows file location and drag the photo into the Photoshop bar. Dragging that, the photo will be imported automatically in Photoshop. That is how you can open a photo in Photoshop within seconds.
Duplicate layer
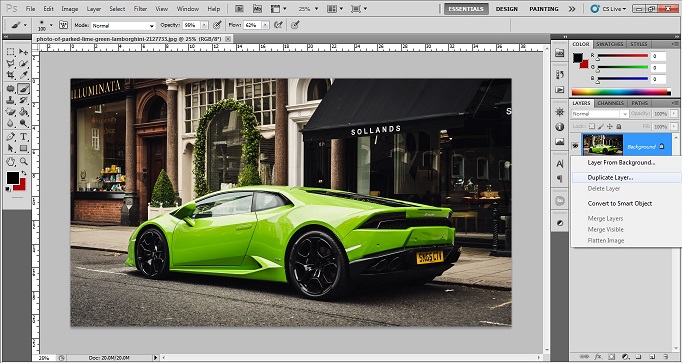
As we are going to add motion into the photo, we need to work in multiple layers using Photoshop. We cannot do everything in original background layer. We need a duplicate background layer at first. TO create a background copy, right click on the background layer. You will get a dialogue box by doing that. Keep cursor on “Duplicate Layer” and click on that. You will get a background copy. Or you can just drag the background layer down to the create new layer icon at the second number from the right. You will get a duplicate background layer within a second by dragging it to that icon.
Select the subject
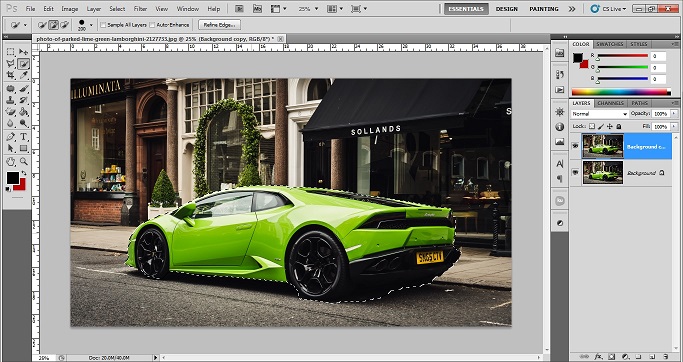
Now it is time for making the subject getting selected to get the background motioned. To make the selection of the subject, we are going to select the selection tool. Go to the tool bar and click on quick selection tool. You can also press ‘w’ on the keyboard to activate quick selection tool. Draw lines over the subject to make the selection or create clipping paths on it. You can outsource clipping path service from experts to get better results.
Create a mask
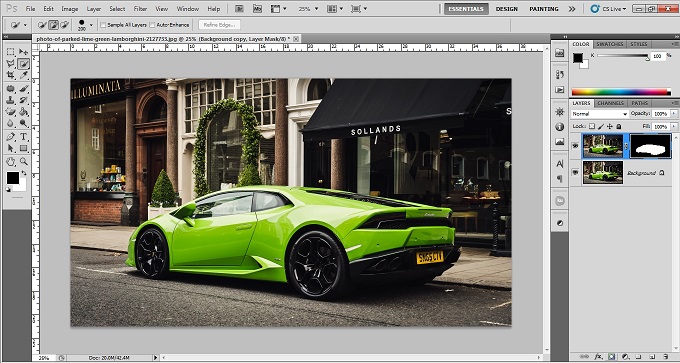
Now after selecting the object in the image create a layer mask on it. Using this layer mask you can separate the object from the background easily. You can create layer mask by clicking on the mask icon in the bottom of the layer tab. Make sure the object is in selection and you have chosen the copied layer while you click on the layer mask button.
Copy the background again
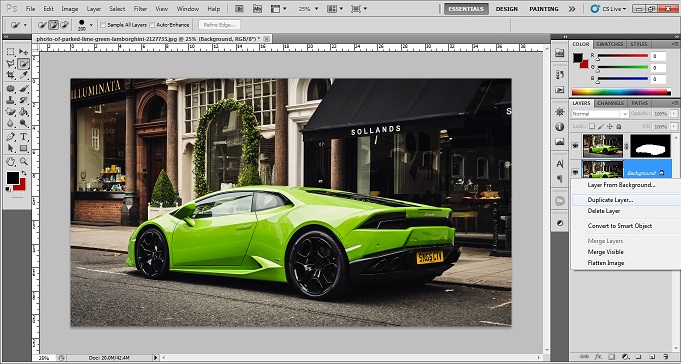
After creating a mask layer over the subject, we need another copy of background layer. We will take the background copy layer the same way. Just drag the background layer down the new layer or right click on the background layer and click on ‘duplicate layer’. We are going to get another copy of background layer named ‘Background Copy 2’.
Apply motion blur filter
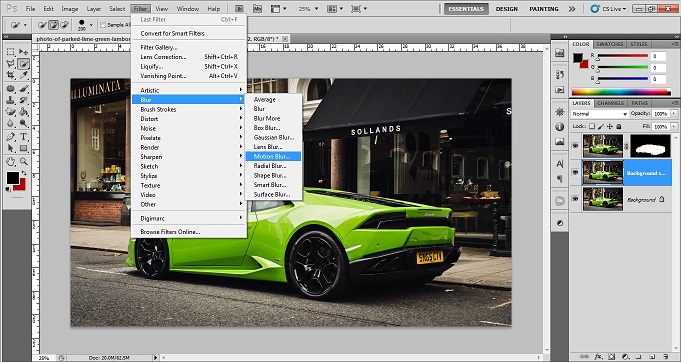
Now you will have to apply motion blur to the background copy 2 layer. This will create a motion on the whole image. It will make the car look like its moving. So go to the filter> Blur > Motion blur. Then you will get a dialog box where you will have to adjust the blur level and direction of motion.
Adjust the angle of blur
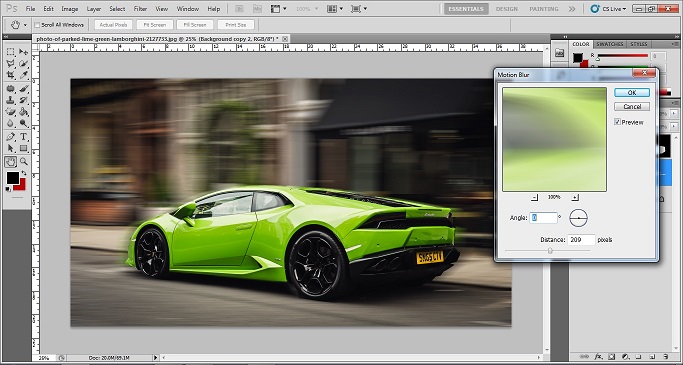
In the dialog box or the adjustment box of the motion blur (Photoshop blur adjustment layer) you can adjust the angle of the blur. If the car is facing towards left the motion angle should be towards right. Juts use this rule to adjust the blur angle and then you are done with applying motion to your objects. So that it looks like the picture is moving.
Before and after
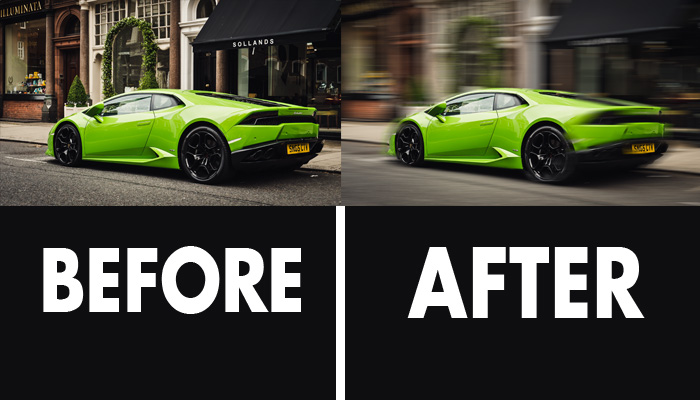
Here is how the picture will look (How to make a picture look like it’s moving) like after you apply motion trail effect to it –
Conclusion
You can now also use this cool image manipulation technique of using motion trail effect to make the picture like its moving. Keep using your imagination so that you improve in this sort of photo editing technique. Best of luck!


