Most of you who are reading this article must be quite familiar with this word “Drop Shadow”. Almost all the Photo editing services, designers and even some world class photographers use this word around every day.
And at least for once in your life, you must’ve also asked yourself that what is a “Drop shadow” ? or how can I create a professional shadow effect on Photoshop? You will surely get all your answers about drop shadow effect Photoshop from this article. These steps will make you the professional of making a realistic drop shadow effect using Photoshop.
Therefore, without further ado let’s start!
Importing the Image in Photoshop
The first and foremost thing to do to edit photos in Photoshop is importing the photo in Photoshop. It is obvious that you have to open the photo to work in Photoshop. Importing the image means opening the photo. I’m saying the thing because importing work may found confusing to some people. Anyway, let’s proceed to the first step.
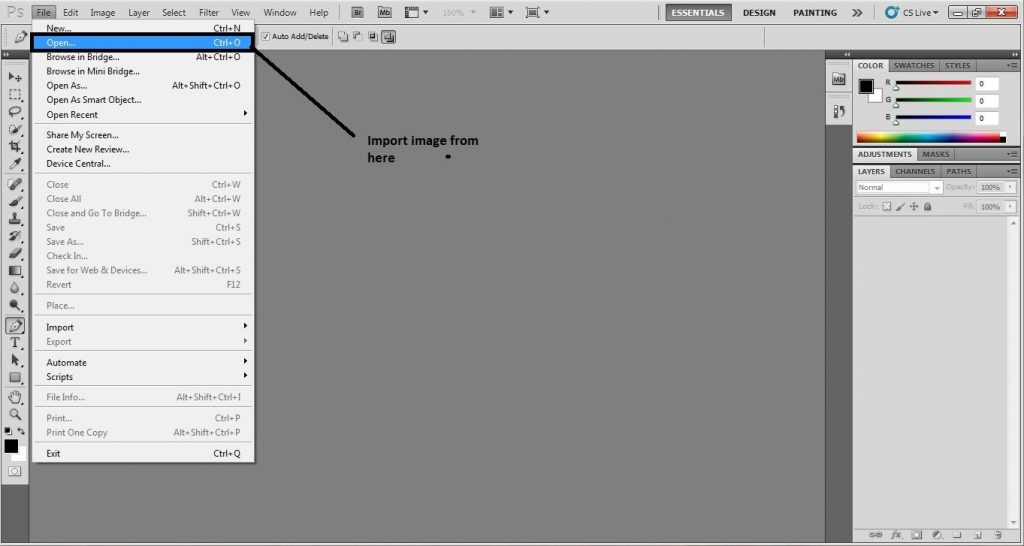
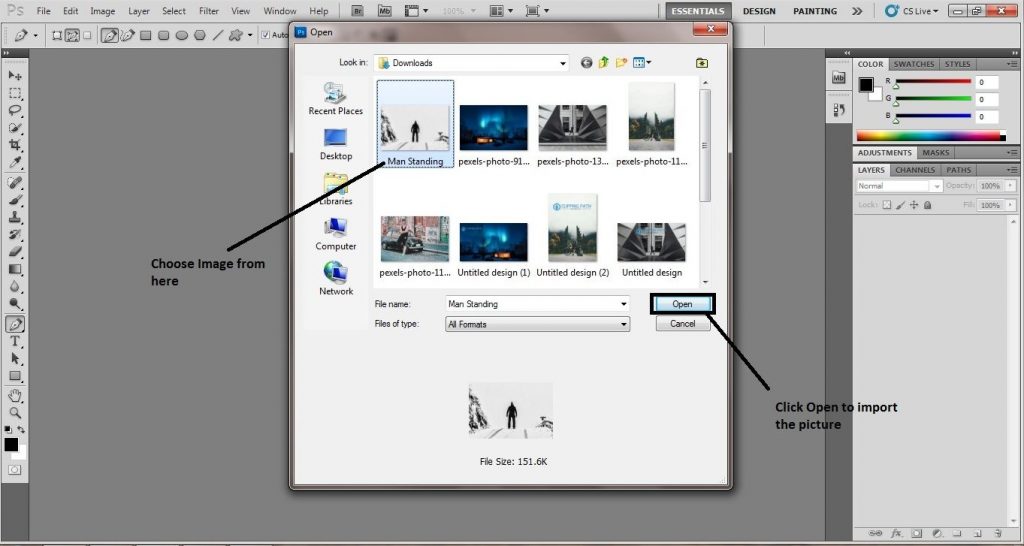
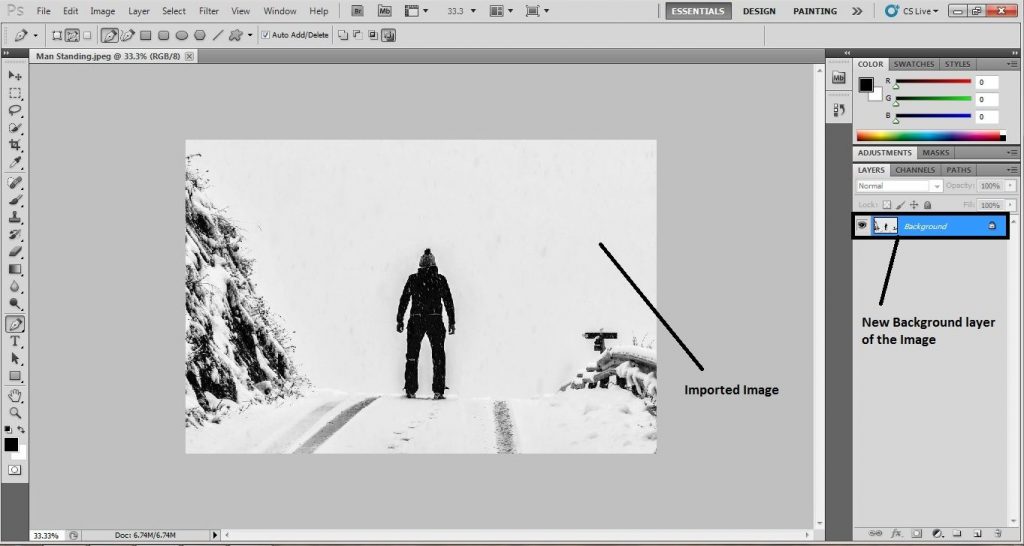
To import the photo in Photoshop, there are simple ways. Manual and automatic. The manual way of importing an image in Photoshop is go to File>Open. You will get a windows box. From the windows box, go to the drive you have your desired photo to edit. Click on the photo and click open. That will manually import the photo in Photoshop.
Another way of opening an image in Photoshop is way simpler. It doesn’t even take 5 seconds. Go to the drive you have the photo in and drag the photo in the Photoshop bar. That is how the photo will be opened automatically.
How to make a realistic drop shadow in photoshop cs5
Create Clipping Mask on the Man
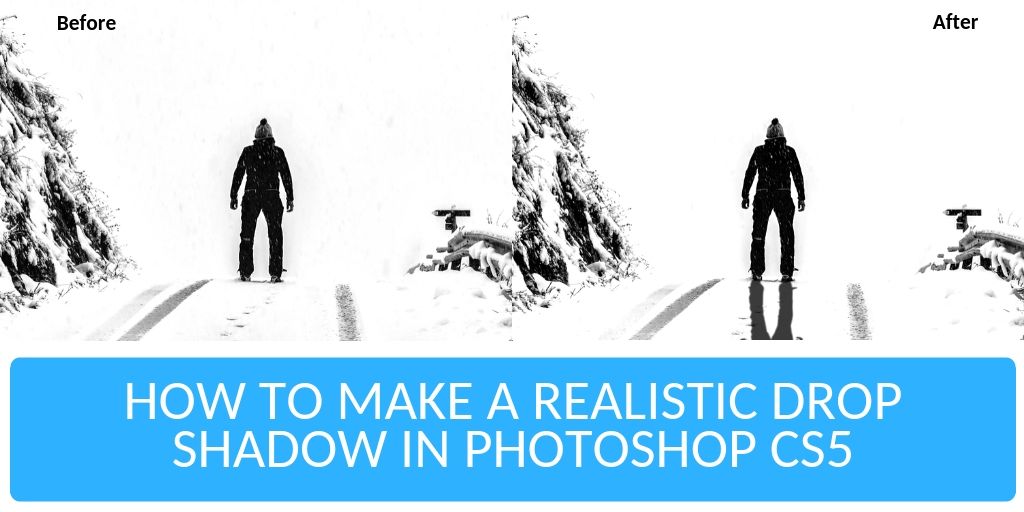
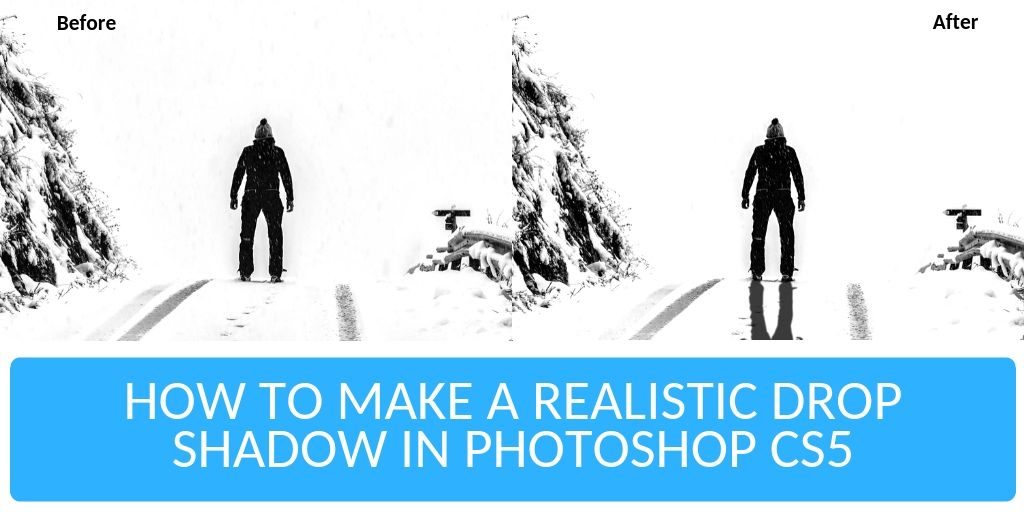
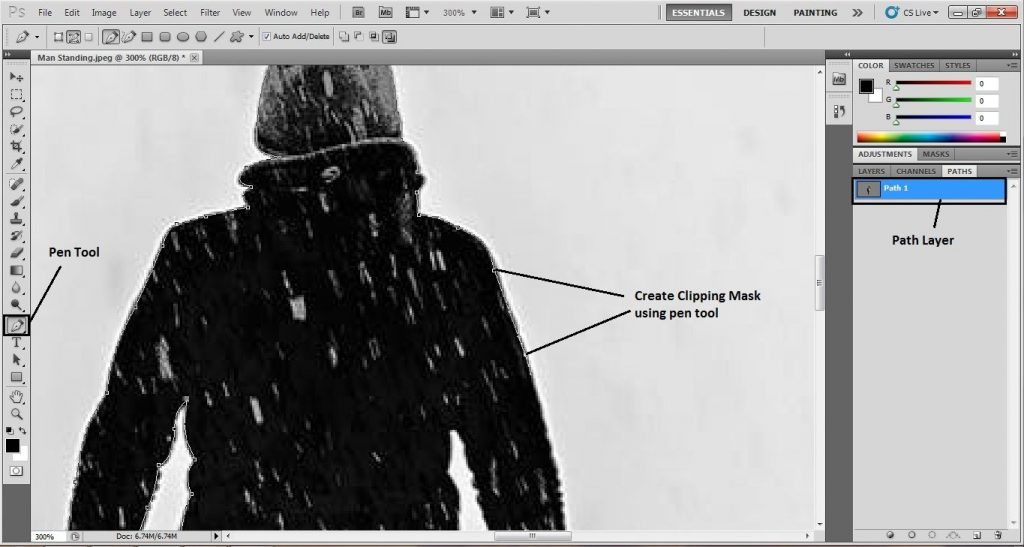
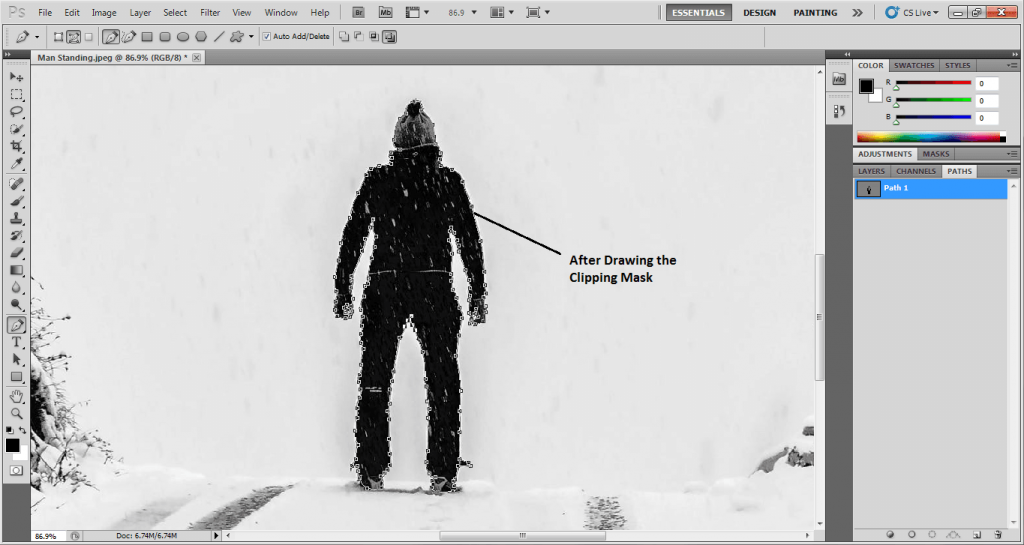
Here, we have taken a photo of a man standing on whom we are going to add a drop shadow. For doing that, we have to create a clipping path keeping the shape of the person constant. Select the pen tool from the tools bar by pressing ‘p’ on the keyboard.
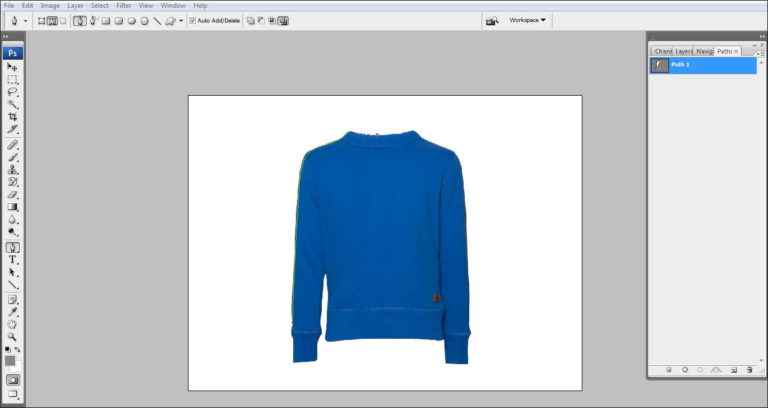
Pen tools are considered as the most powerful tool to draw a clipping path. So we have selected pen tool. With the pen tool, we have drawn the clipping path very carefully and did not leave any area and did not take any unnecessary area as well. We have drawn clipping path on the background layer. Close the path with the anchors very carefully. Remember, clipping path will not be completed if it’s not close with anchors.
Make Selection of the Clipping Path
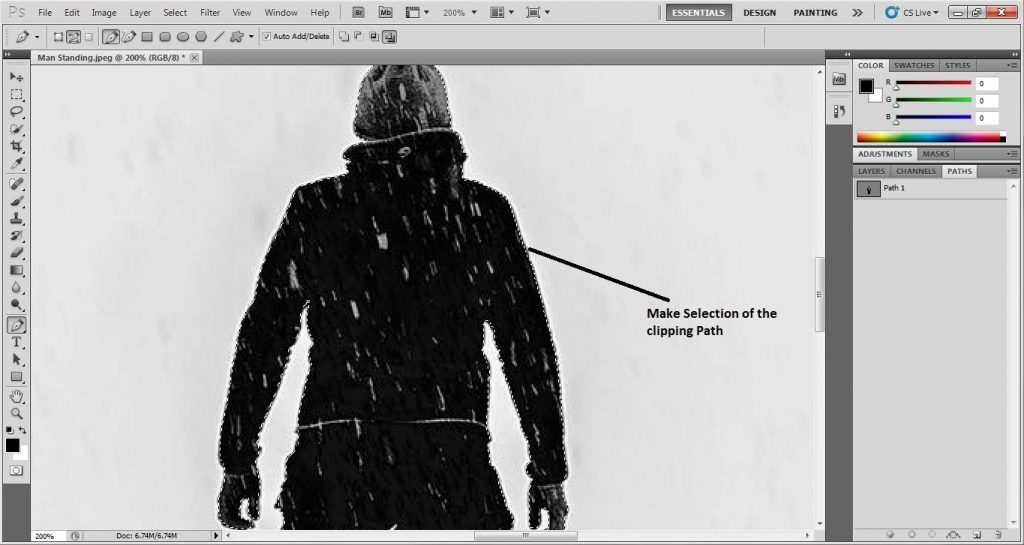
After creating the clipping path of the man successfully, we need to make the selection of that clipping path. Without selecting the path layer, you cannot make the shadow perfectly. So it’s time to make the selection. Making the selection of the clipping mask is quite easy to do. Click on ‘Path 1’ and at the same time press ‘enter’ on the keyboard. You can also press ‘q’ to ensure that the background is perfectly being isolated or not. The entire clipping masked area will be selected after doing that. Only after making the selection, you can proceed to the next step.
Take A Transparent Layer
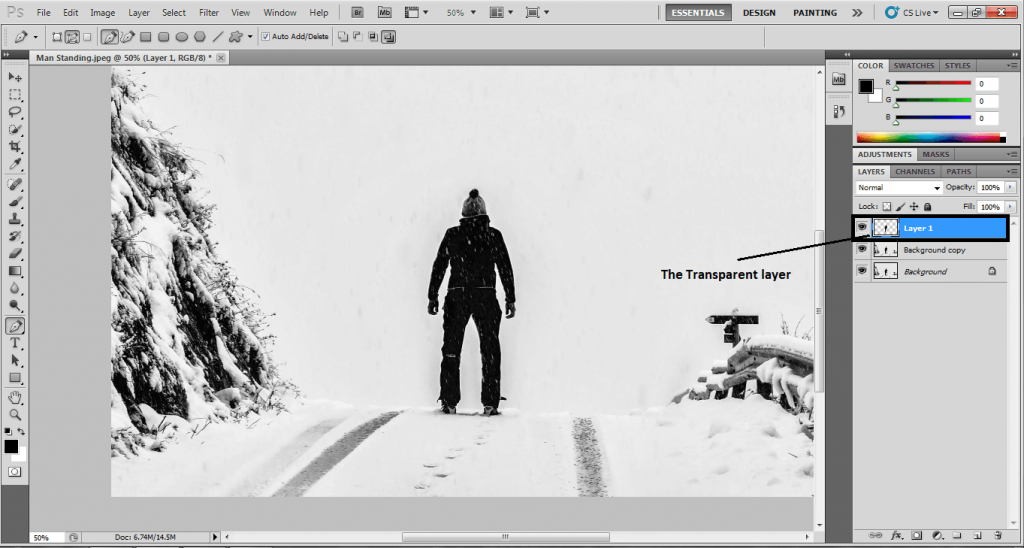
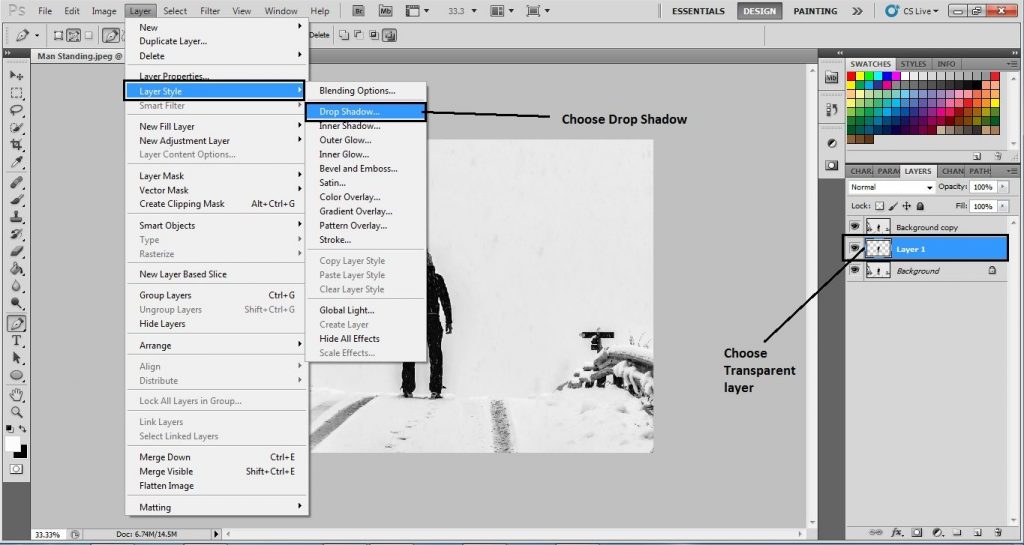
To create a drop shadow, we have isolated the background and brought the subject in a new transparent layer. Working in a transparent layer will give you clarity. We can work on any type of work we want to do. To create the transparent layer and to bring the subject here, press ‘ctrl+j’ in the layer bar. The subject will automatically come in the transparent background.
Take Copy of Background Layer
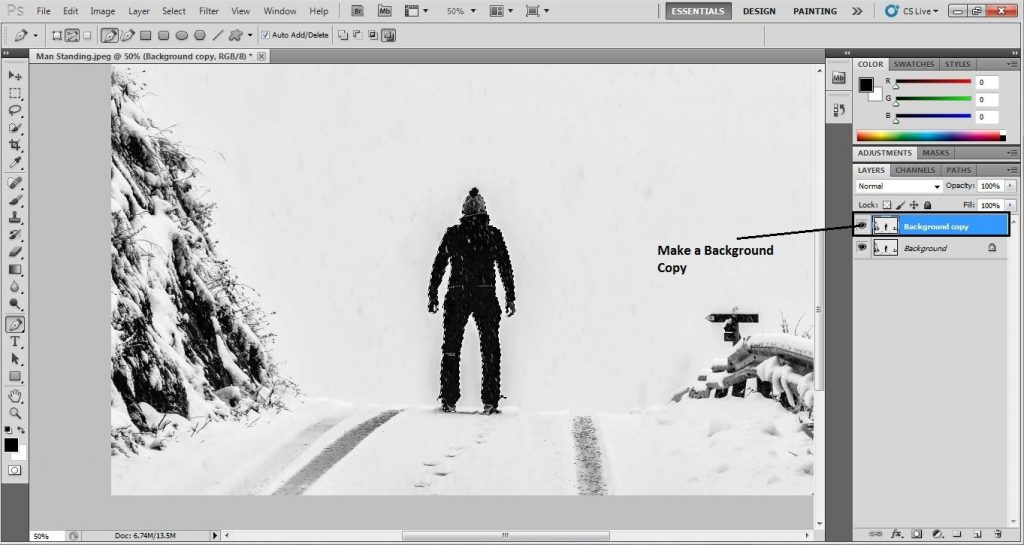
The next thing you have to do is to take the copy of background layer. It is necessary to make the copy of the background layer. It is important because when the shadow will be added, it will make a duplicate copy of the subject if you work in the original background layer. So we are going to get into creating a ‘Background Copy’. Drag the Background layer down the box and put into the square shape next to trash on the left side. When you drag the background layer, a layer named background copy will be created automatically.
Add Drop Shadow
The main work starts right after creating the transparent layer of the clipping mask. We will work in the transparent layer now. In the transparent layer, click on Layer>Layer Style> Drop Shadow. Doing that, you will see a shadow is created around the subject. Do not press OK until you are done with adjusting the size of the shadow. Do not close the dialogue bar.
Adjust the Size and Amount of Drop Shadow
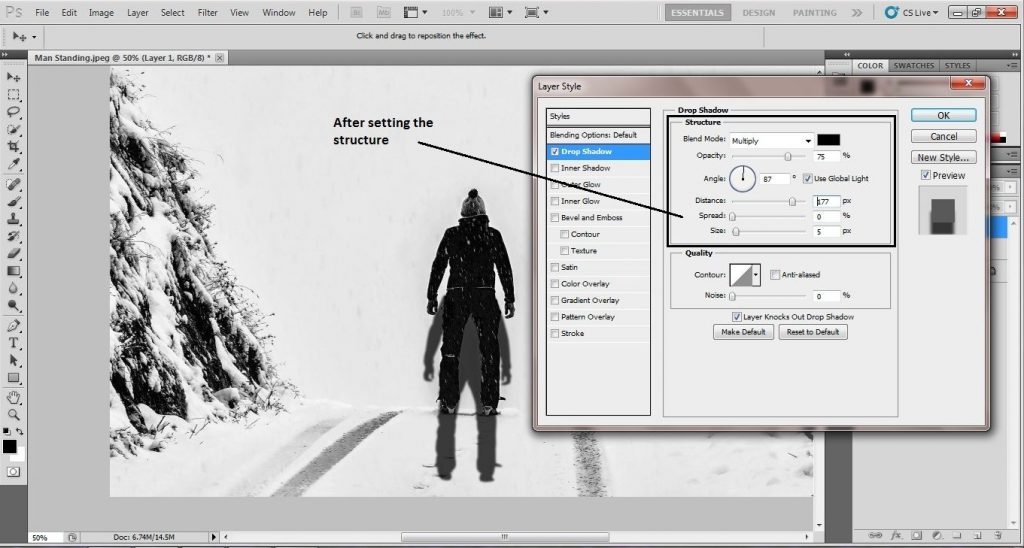
When you bring the drop shadow dialogue box, you will see different navigation, styles, sliders. Amount etc. These are the measurements of a drop shadow. You have increased and decrease the amount of shadow, you can make the shadow wider or thinner. All the things you have to do from here. So here, we have set the shadow opacity to 75% and we kept it on the middle angle. When you are sure you are okay with the shadow size and opacity, press okay to proceed.
Create a New Layer
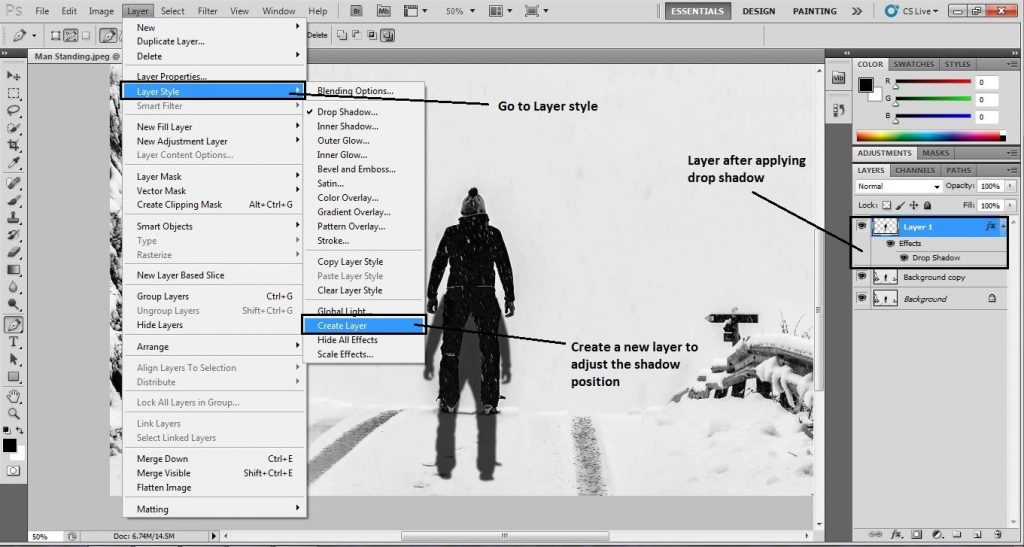
The work of adding the drop shadow does not end up here. The shadow is not in the right position now. Now we will create a new layer where we will put the shadow in the right place. To create a new layer, click on Layer>Layer Style>Create New Layer. Doing that, a new layer will be created on which you can work and proceed to the next step.
Re-position of the Shadow
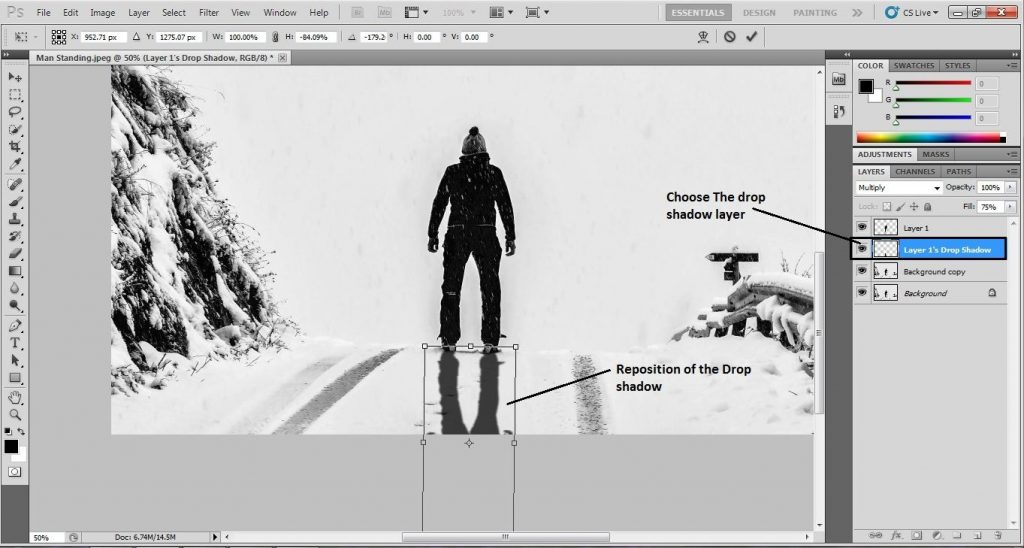
Here, we have reached the final step of adding a drop shadow. Since we have created a new layer of a drop shadow, we are going to complete the work in this layer. It is time to bring the shadow in the right place, in the right position. We need to go from the transformation of the shadow. To transform the shadow, press ‘ctrl+t’ on the keyboard. You will see a square box containing the stretching lines. With that tool, you can put the shadow in any position and size. We have rotated the shadow and put the shadow in the opposite side down the man so that it looks natural. Press ‘enter’ after placing the shadow.
Conclusion
Photoshop is like a boon for all the designers in the world. It has enabled them to work and earn their living plus fame through it. And drop shadow effect is an image editing technique used by most of the designers available in this industry. Many various e-commerce industries are taking these services in order to advertise their product pictures in an attractive manner. Therefore, these steps can easily help you overcome your obstacles in designing and will definitely help you to create a realistic drop shadow effect using Photoshop in minutes.
Reference :
How To Make Realistic Shadows in Photoshop [Trick You Probably Don’t Know]
Realistic Cast Shadow Effect In Photoshop

