In the world of photography, there are different ways of displaying the photographs adapted by the photographers. Professional photographers know how to do photography and where and how to display them. Earlier, the photographers used to suffer if they could not click photographs. Since after the photo editing techniques came into the lives of photographers, it changes the life of them. In fact, there are many photo editing company have been grown up in the world who earn a lot of money by providing their Photo Editing Services.
Every photo based individual and companies are in need of photo editing services. Here, I would more specify the e-commerce companies. The e-commerce companies sell their product online. The entire business of them is running by displaying the photographs of products. If the product photographs are not convincing enough, it becomes hard to sell them. As an e-commerce businessman, you should display every product separately even if you have shot the products with the model. It will help your customers to understand the products. But how would you separate every product from the model. Well, it is multiple clipping paths which help you to separate the items from models and the background. It makes easier if you know how to make multiple clipping paths yourself. Without further adieu let’s see how it can be done.
Here is the Technique of making multiple clipping path by the help of Photoshop CS5
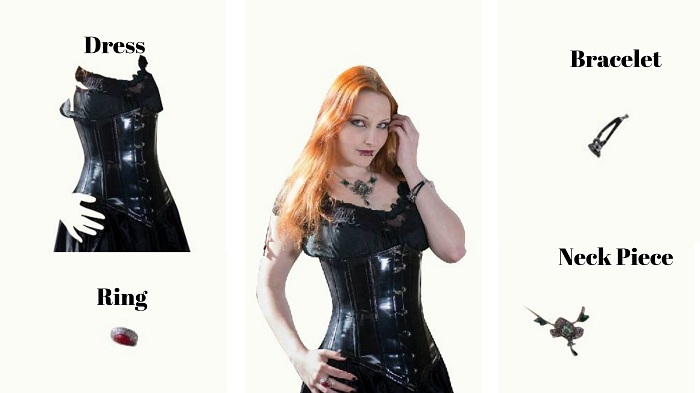
Open the Image in Photoshop
For every types of photo editing, Photoshop plays an amazing role. Almost all the photo editing companies do photo editing using Photoshop. So to make the multiple clipping paths, you need to open a photo in Photoshop.
It is a very easy thing to open the photo in Photoshop. To open the photo in Photoshop, go to File>Open. Select the photo from the place the photo is located. Press enter and see the photo appeared on the Photoshop screen. You can also open the photo by dragging the photo from your windows. But the Photoshop should remain opened while you drag the photo.
Here’s the Photo we have selected to work with
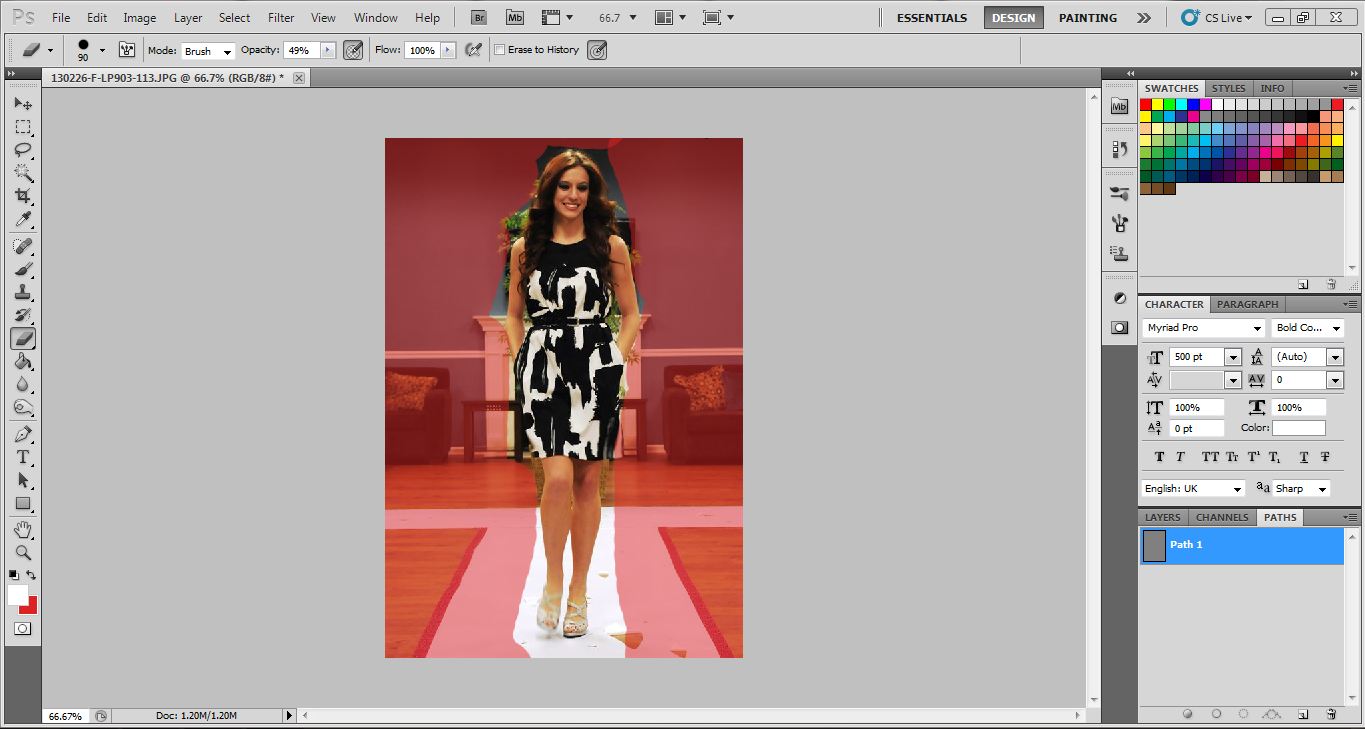
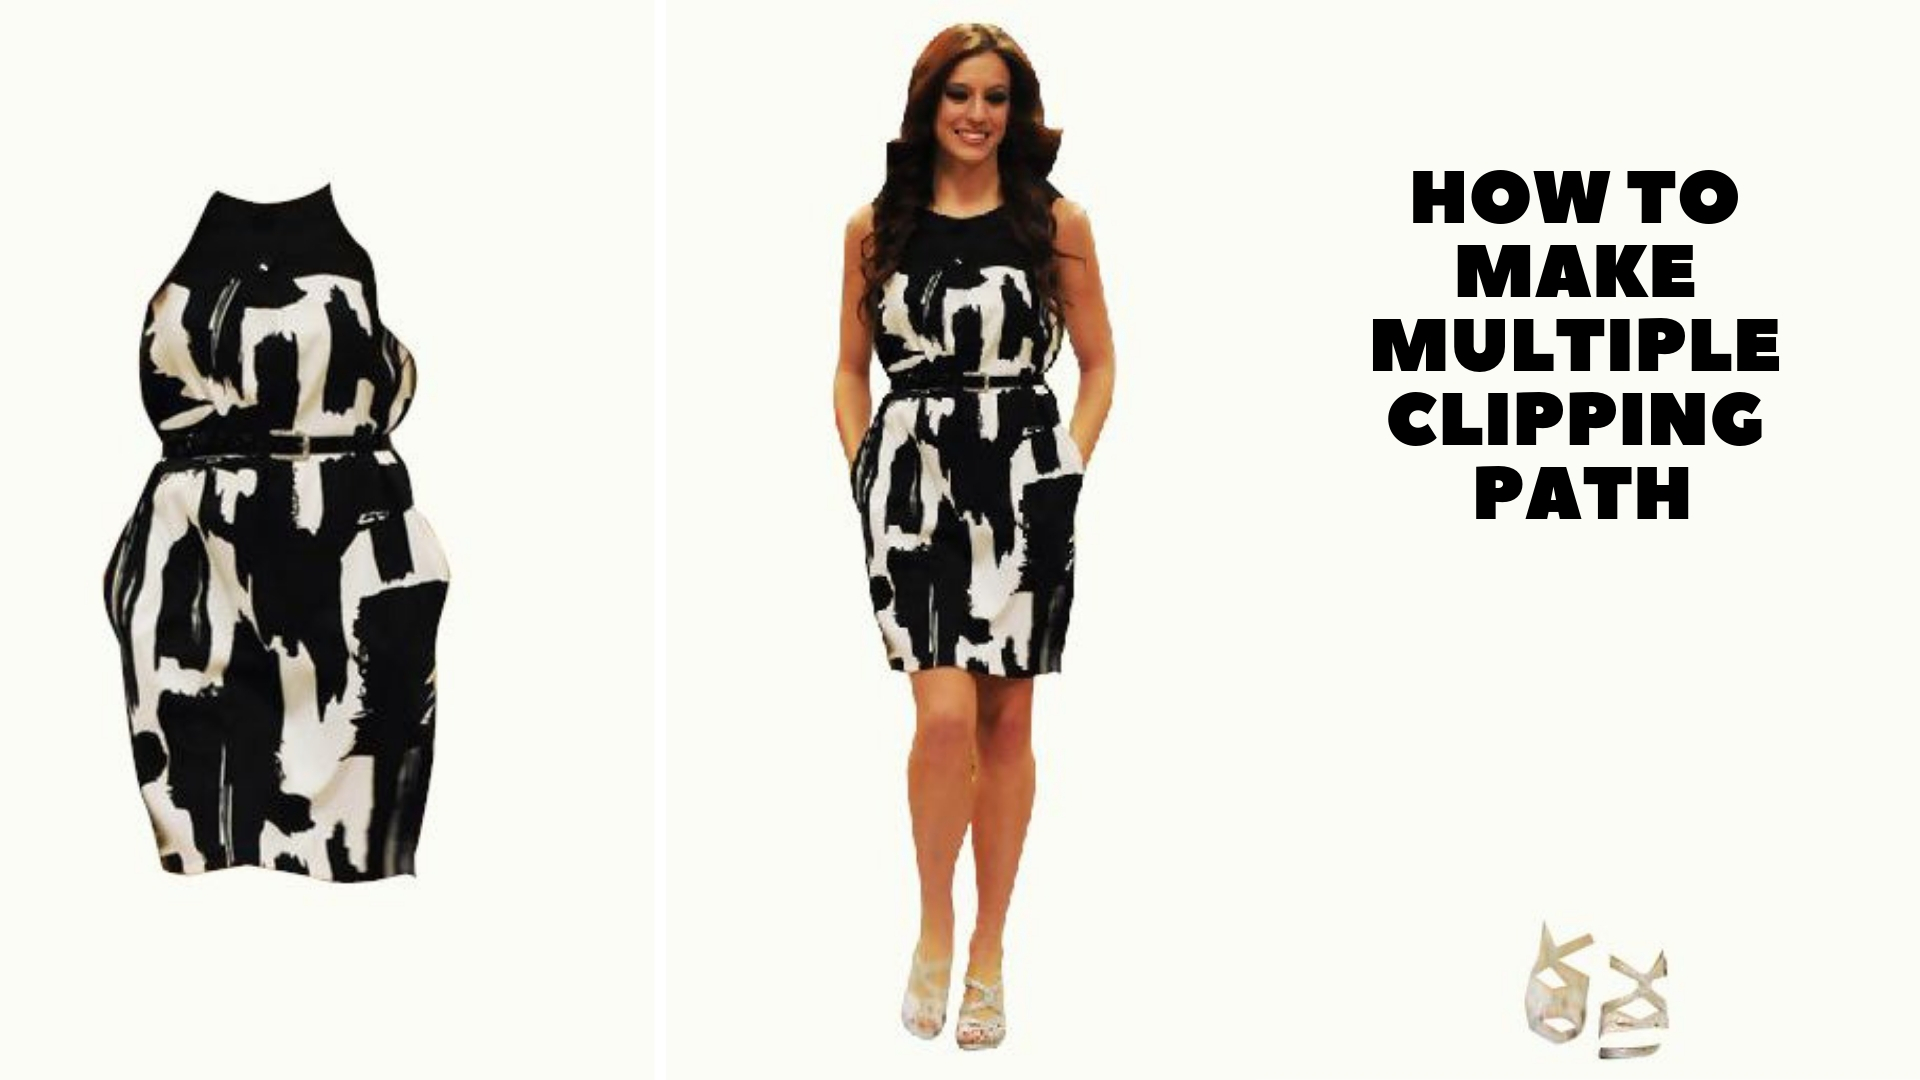
We have selected the photo of a model who is wearing a beautiful dress and a pair of shoes. We are going to separate the dress and the shoes from the model thus, the background will also be changed.
Select Pen Tool
There are many tools of removing background in Photoshop. The best and the most flexible background removal tool in Photoshop is the pen tool. Most of the photo editing companies use Photoshop pen tool in vast number.
To activate the pen tool in Photoshop, press ’p’ on the keyboard of go to the tool bar and click on the pen icon which will enable the pen tool for you. We have selected the pen tool to work on clipping path because it is not restricted and we can mold it however we want.
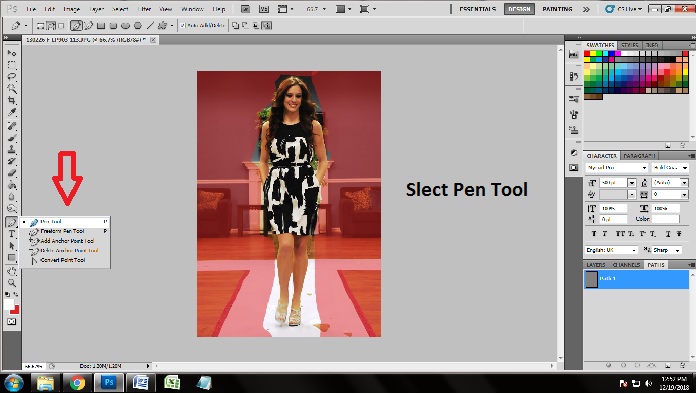
Since we are going to make multiple clipping path, we will draw the clipping path over 3 things separately which includes the entire model, model’s dress and the shoes. We are going to discuss them below.
Clipping Path of the Model
At first we have to create the clipping path over the entire model. It is necessary because by this you will understand how you will create the clipping path of the other things as well.
Here is the technique of creating clipping path of the model
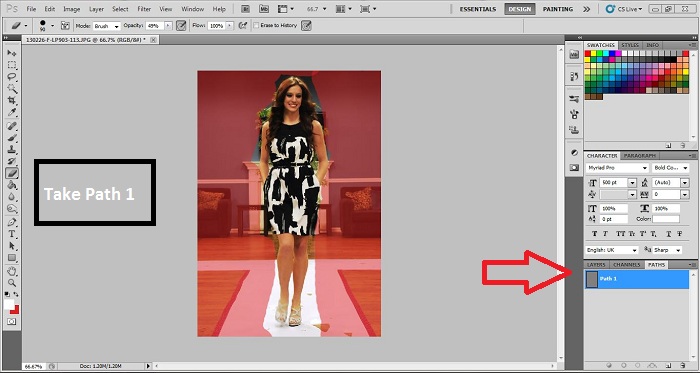
Take Path 1 Layer
To draw clipping path, it is important to work on path layer. You will get the path layer in layer panel. Go to the layer panel and you will see ‘Paths’ on the right corner side. Click on the “paths’ and you will get another box which is of paths. To take the first path layer, click on the square icon from the down with the remove icon. Doing that, you will get your first path layer named ‘path 1’ in this first path layer, we are going to create the clipping path all over the model.
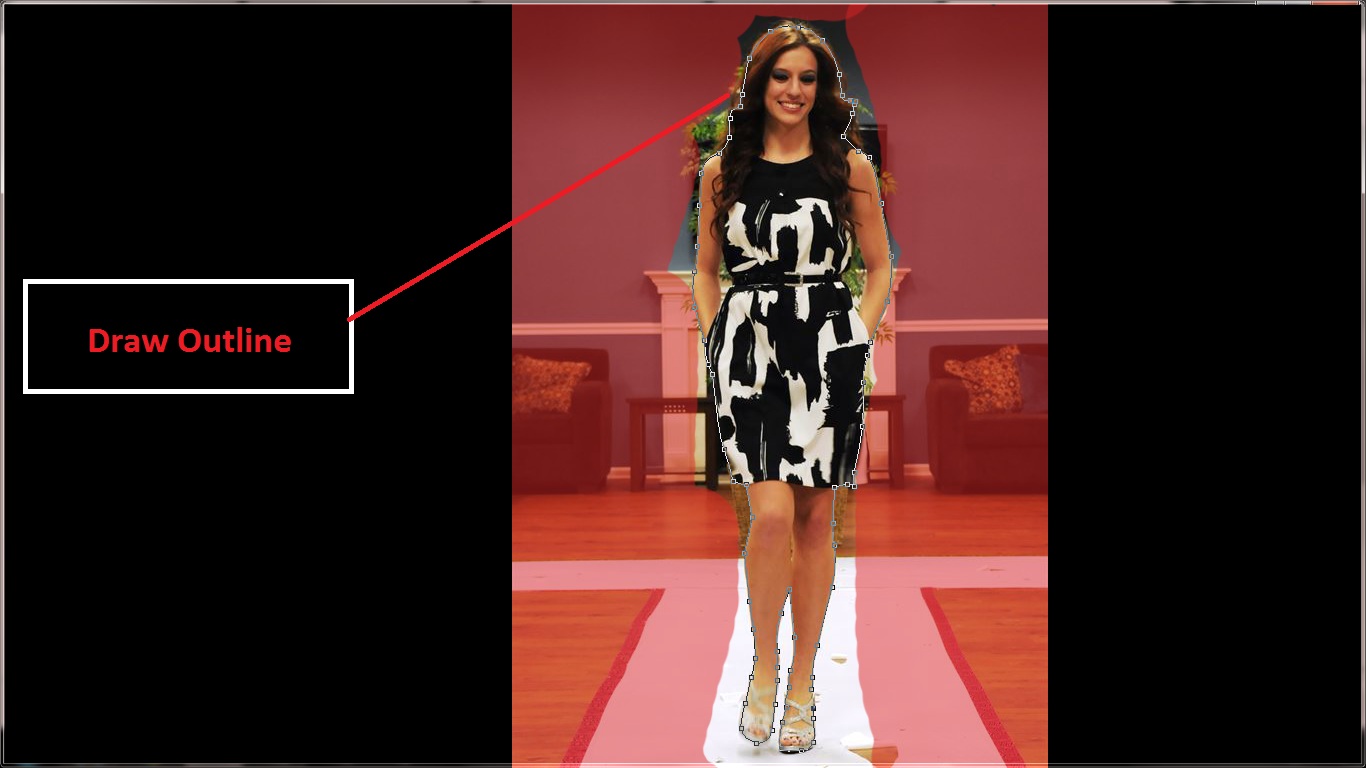
Draw Outline over the Model
To change photo background in Photoshop, you have to draw the outline of any photograph you want to remove the background of. We are going to do the same thing out here. As we have already selected pen tool, we will have to draw the clipping mask over the model. Zoom in with 100% to work properly. As the image is pretty curvy, you have to be very careful while putting the anchor points. If the anchor points are dislocated, your work will be horrendous. Put anchor points on their right places and break the anchor points to move with the help of ‘alt’.
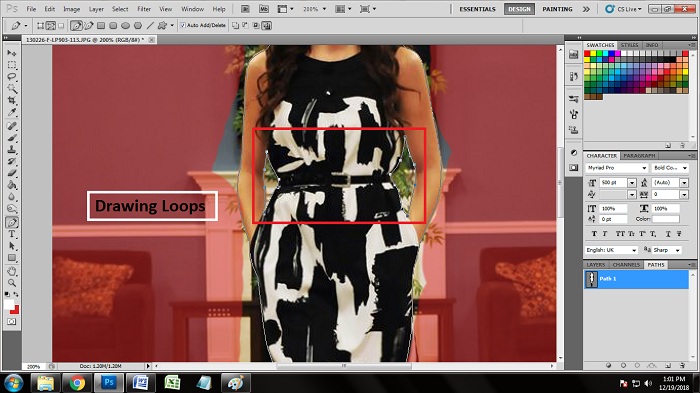
Draw the Loops
If your selected photo has holes or loops in the Photo, it becomes a difficult removing the background and people do not understand how to remove the background of those photos. Well, you have to draw the clipping path of those loops as well. As we are working on ‘Path 1’ layer, we are going to draw path over the looks in the same layer. There might be small holes which cannot be identified. But you have to look for the loops and create the clipping path over the loops. In the photo, here we can see only two loops near the hands. So create the clipping path over those hand areas. Close the clipping path with the anchor points when it is done.
Making the Selection
When you are done with drawing the clipping path both outline and loops, it is time for making the selection of the path area we have worked on. To make the selection of the clipping path of the model, click on path 1. Press ‘ctrl+enter’ which will make you see some many dots moving around the path area which indicates that the path has been selected.
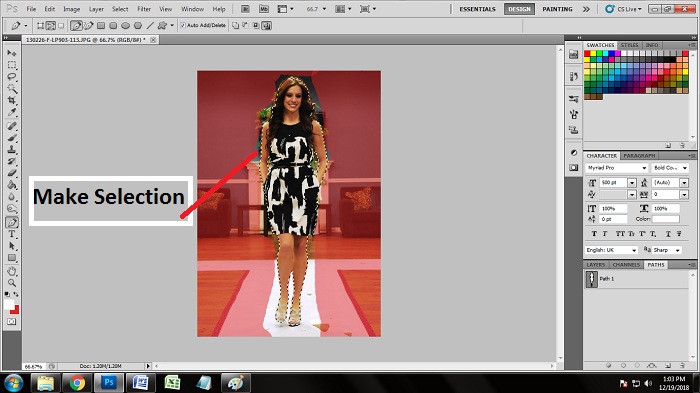
When you have made the selection, press ‘q’ on the keyboard to remove the background and isolate the model from background.
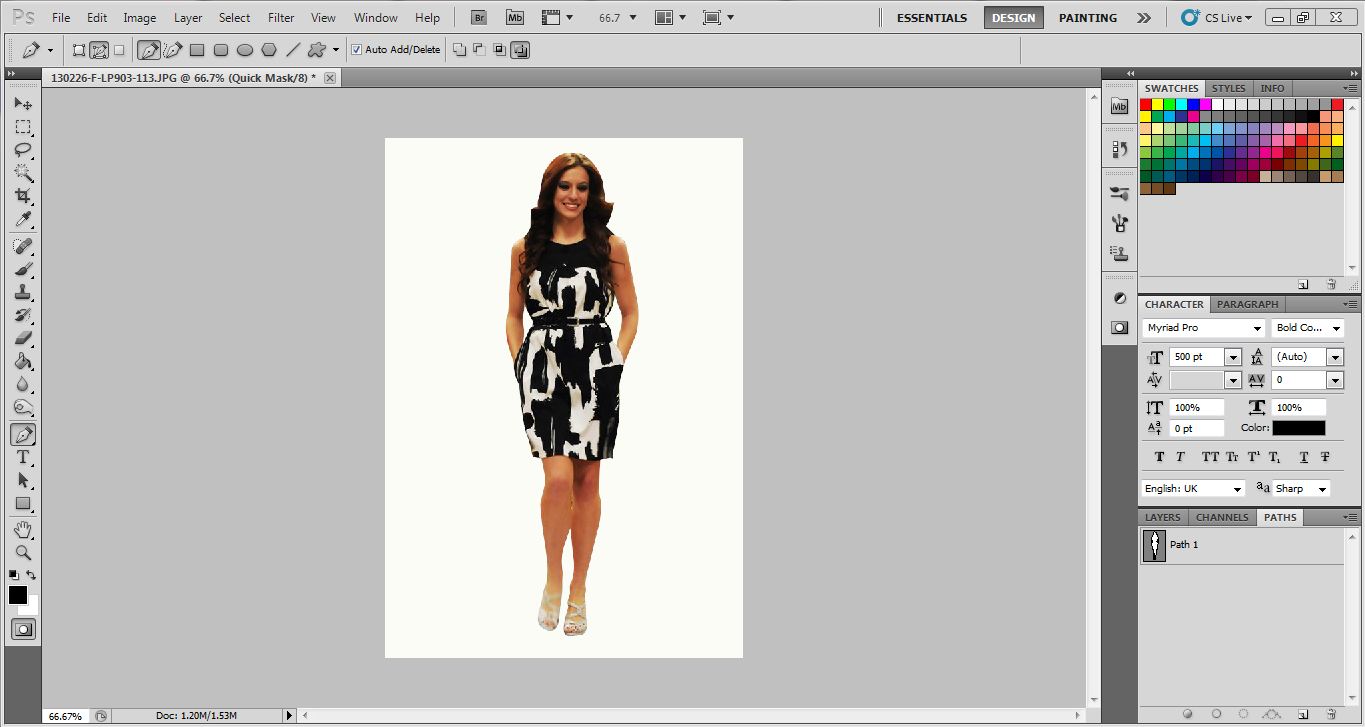
Clipping Path of the Dress
As we have completed doing the clipping path of the entire model, the work hasn’t done yet. To do the multiple paths, we have to do the clipping path of everything separately. Now we are going to make the clipping path over the dress to separate it from the model.
Here’s the technique of creating clipping path over the model’s dress
Take Path 2 Layer
As we have created the clipping path over the entire model, we cannot create any clipping path in the same layer. In order to separate the dress from the model, we have to work on another layer. We are going to take a new path layer. Go to the paths layer again and click on the square icon from the bottom, you will automatically get a new layer named ‘Path 2’. In this Path 2 layer, you have to create the clipping path over the dress of the model.

Draw Clipping Path over the Dress
We have already selected and activated pen tool to draw clipping path. To separate the dress from the model, we are going to make clipping path by the help of the pen tool. In the Path 2 layer, draw the clipping path over the dress. Be very careful while drawing the clipping path so that the skin of the model doesn’t come while clipping. Close the paths with anchor points when it is done.
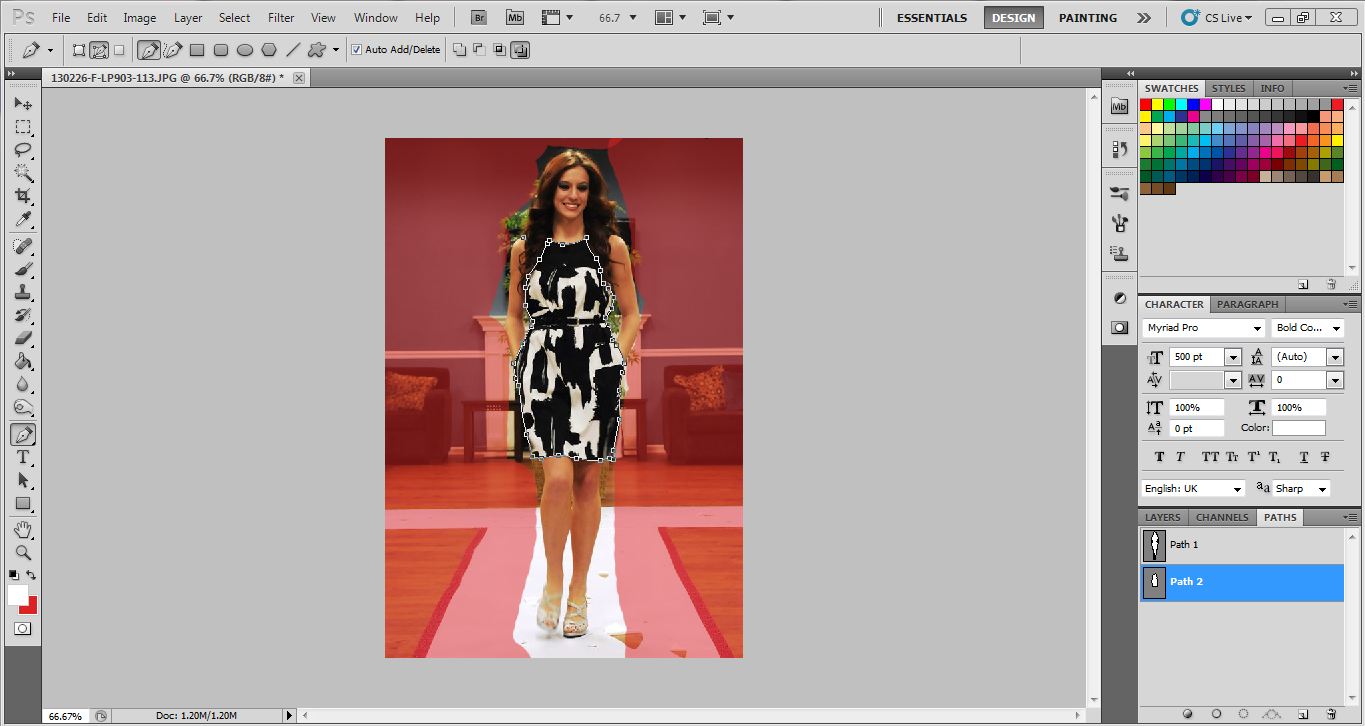
Making the Selection
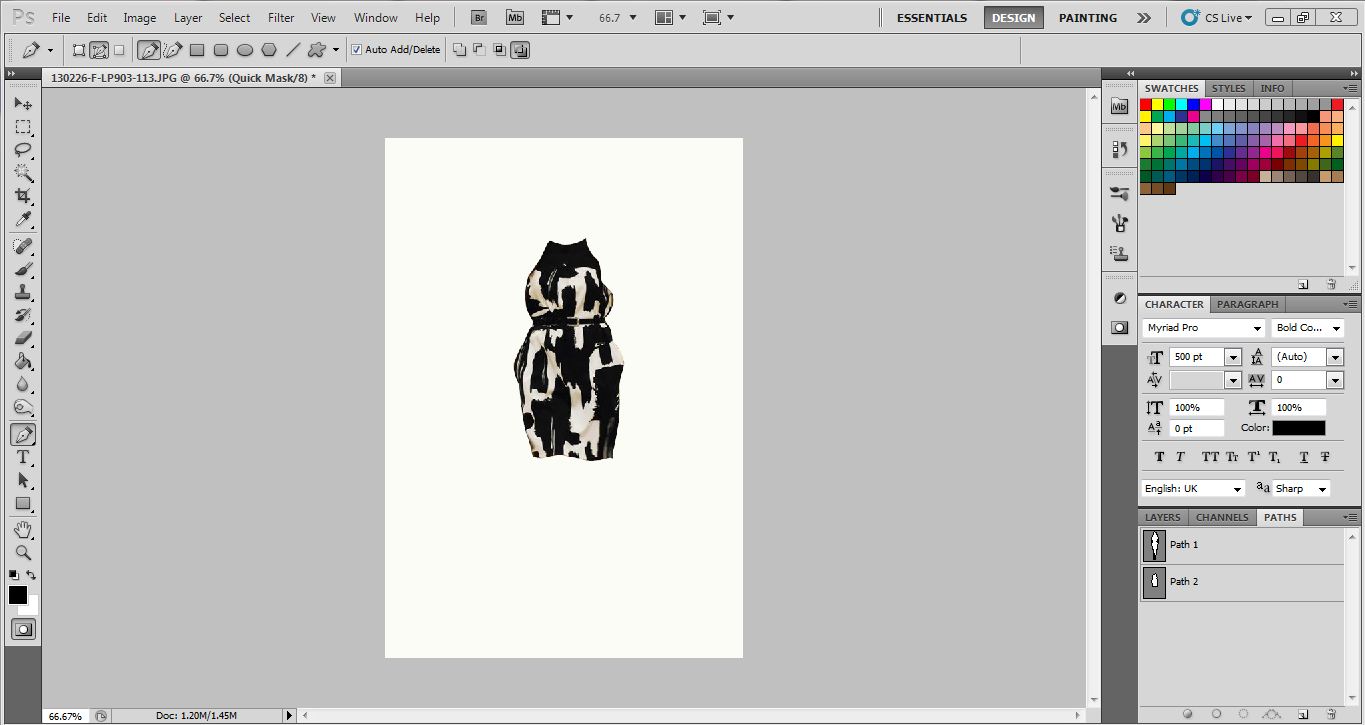
Like the way we have made the selection of the first path of models, the same way we are going to make the selection of this path 2 as well. At first click on the layer ‘path 2’. Then Press ‘ctrl+enter’ on the keyboard together and you will see that the dress part has been selected. It will look like the photo I have given below.
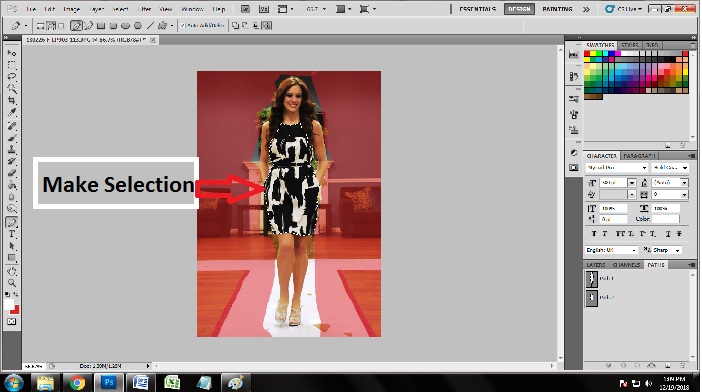
Press ‘q’ to separate the dress from the photo and to remove the background.
Clipping Path of the Shoes
When it comes to multiple clipping paths, it is slightly different from the normal clipping path. As we have created clipping path over the model and the dress, it is time for creating the clipping path over the shoes of the model as well.
Here is the technique of creating clipping path of the model’s Shoes
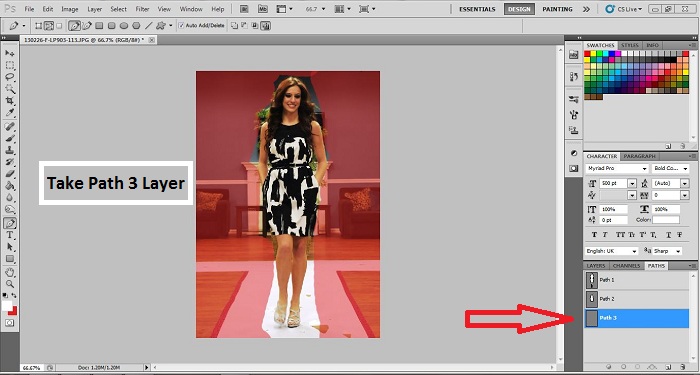
Take ‘Path 3’ Layer
In this step, we are going to take the next layer. Since we have created two different layers and created clipping path of two things. We will create the clipping path of the shoes in another new layer. Take the layer in the same way in the ‘paths’. When you will click on the new path layer, you will get a new path layer named ‘Path 3’. We are going to work on path and going to draw clipping path over the shoes.
Draw Clipping Path over the Shoes
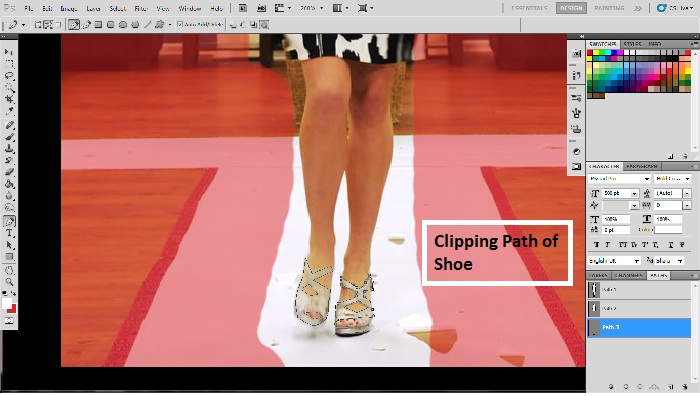
Here in this photo, the shoes are looking very tiny. You have to be very careful while drawing the clipping path over the shoes. Zoom in the photo to draw clipping path in the right shape. Again, no skin can get into the shoe while drawing clipping path. Draw two different path for two different pair of shoes.
Make the Selection
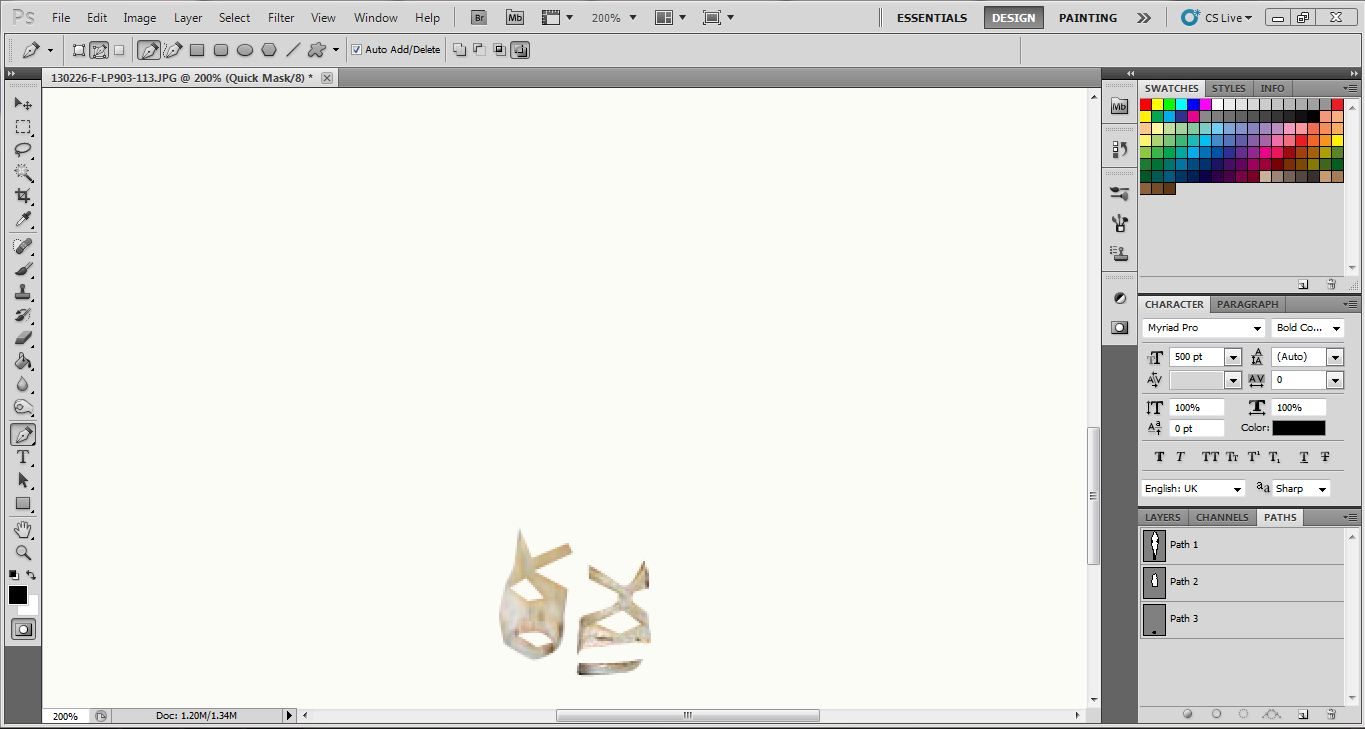
When you are done with making the clipping path over the shoe area, make the selection of this. As we have discussed, just click on ‘path 3’ and press ‘ctrl+enter’ on the keyboard at the same time. Press ‘q’ to remove the background and separate the shoes from the model.
Conclusion
There are many tricks and techniques of removing background; you just need to know the secret tips of removing background. However, multiple clipping paths help a lot to the companies to separate their products and show them in great way. I hope this tutorial is going to help you doing multiple clipping paths by yourself. Try it out. You can also outsource clipping path service from us at a very low cost.

