Photoshop has been quite an essential tool for many photographers and photo editing companies. People are nowadays getting more engaged on sharing edited pictures with various effects like soft glow effect rather than the actual raw ones. It is quite an obvious choice for them most likely because edited photos look better.
There are many tutorials based on such awesome things that can be done using Photoshop. For example you can remove background from an image using Photoshop or you can also change the color of anything using it.
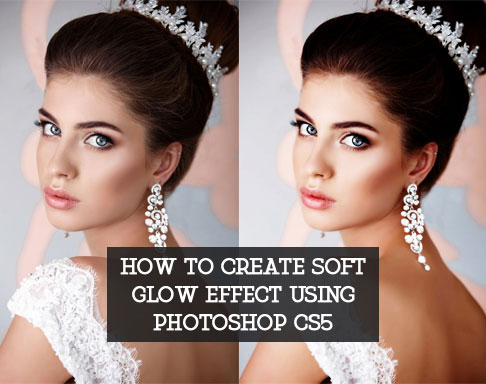
Photoshop has various uses that are uncountable. In this article I’ll show you that how you can create a soft glow effect on wedding photographs or any other using Photoshop cs5. Hope you’ll learn something new today.
So without taking more time let’s start!
Open the image in Photoshop
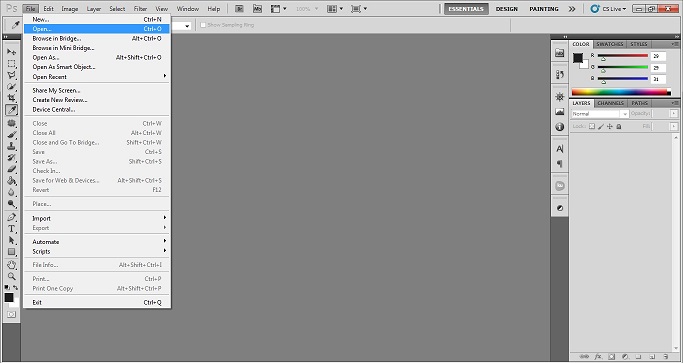
You can open the photograph naturally or physically also. This is the strategy to open the photograph physically, open Photoshop application and go to File>Open. You will get an exchange box of windows. Go to the drive where you have your required photograph. Snap on the photograph and press enter. Your photograph will be opened in Photoshop by doing that. There is another simple method for bringing in the photograph in Photoshop. You simply need to have your Photoshop opened. Go to the drive where your required photograph is found. Snap on the photograph and drag that to Photoshop bar. The photograph will be opened in a small amount of second.
Duplicate layer
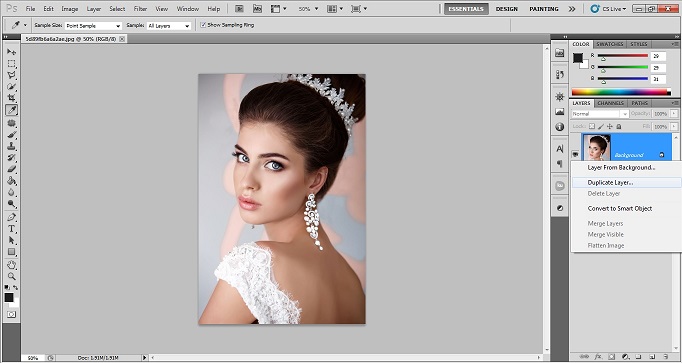
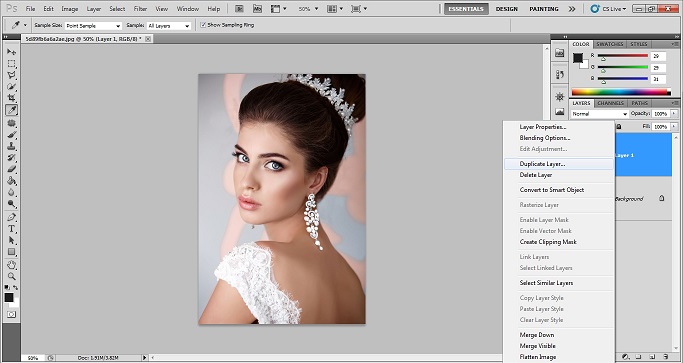
To apply the further effects on the image you will open in Photoshop we will need to duplicate the background layer twice. These two layers will get used to do the frequency separation technique. To duplicate the background layer once right click on the background layer and choose the duplicate layer option. Then again choose the new layer and duplicate that layer using the same rule. You will now have two copies of the background layer on which we’ll do the other steps.
Rename the two layers
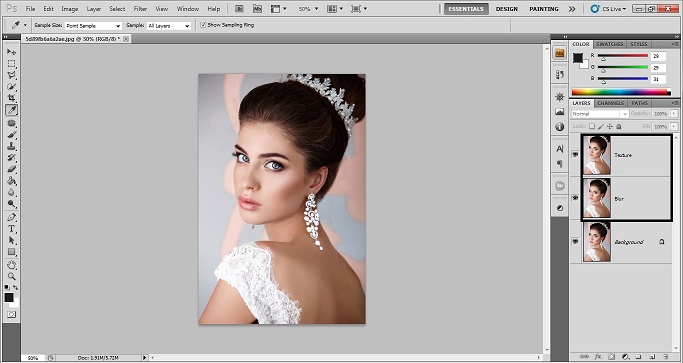
Now simply rename the layers before moving forward. This will help you work easily without getting confused about what layer you’re using for what. Name the first layer texture and the other one blur. Keep the blur layer below the texture layer.
Choose Gaussian blur and apply it
Now we’ll start frequency separation technique. The first thing for this technique is to apply Gaussian blur on the blur layer. To apply blur first go to the filter menu on the top bar then go to Blur>Gaussian blur.
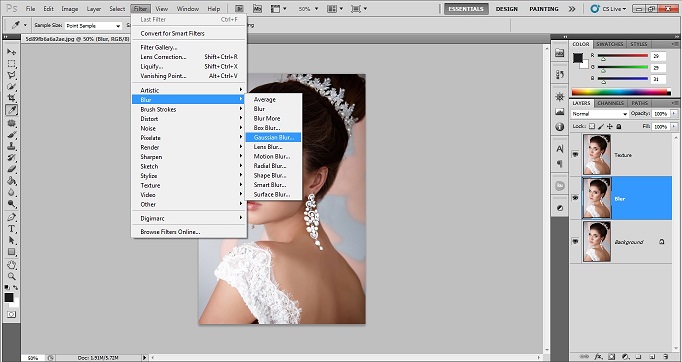
When you choose the Gaussian blur a pop up tab will open with the amount of blur you want on the layer. Keep the blur level to 2. This will be enough for the soft glow effect.
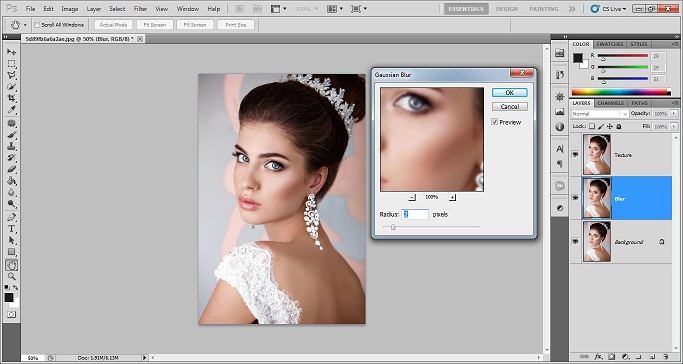
Choose apply image on the texture layer
Now we’ll have to make the texture layers work as a texture. For this we will have to use the apply image option on the texture layer. To choose the apply image option go to image option on top bar then choose apply image.
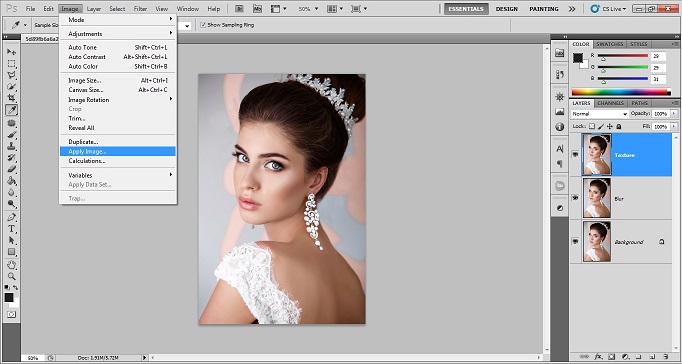
After choosing apply image a dialog box will open for the setting of the apply image. Change the RGB layer to blur layer and choose subtract on the blending option.
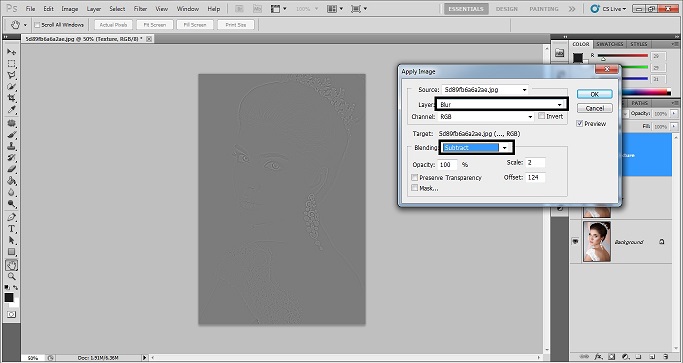
Set blending mode to vivid light
Now after you setup the texture layer properly you’ll see the layer has grey color. It is showing the sharpness over the blur of the actual image. Now to put the glow effect simply change the blending mode of the texture layer to vivid light. This will add the soft glow effect on the subjects face on the image.
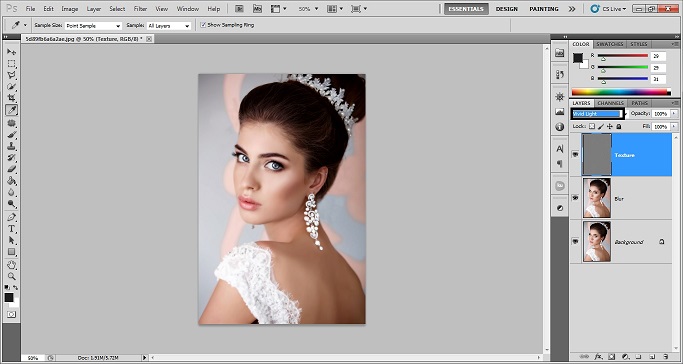
Sharpen the eye
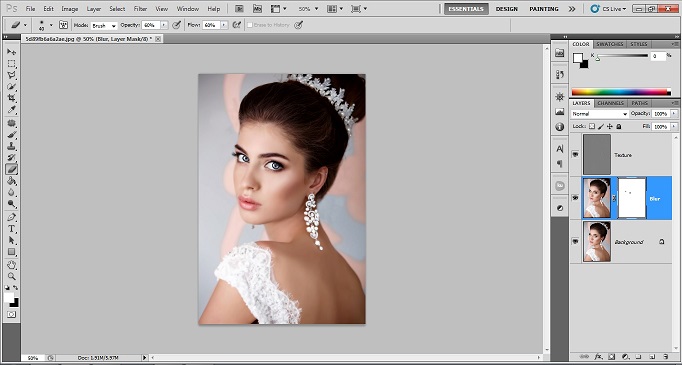
Sometimes after using this technique you’ll see that the eyes of the subject have become blurring too. To reduce or remove this blur from the eye choose the blur layer and create a layer mask on it. You can find layer mask option at the bottom of the layer tab. It is like a screen with a hole in the center. Use a paint brush of black color paint on the area of the eyes. Make sure the paint brush has a flow and opacity of 60%.
Choose and set the brightness and contrast layer
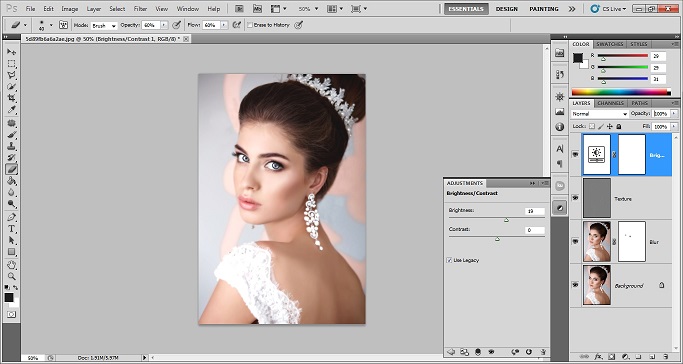
Now simply increase the brightness of the whole image and see that how your subject gets a soft glow on her skin and surrounding. To increase the brightness of the image choose the adjustment layers and select brightness and contrast layer. Keep the value of brightness of something between 15 to 19 pixels and then see the magic.
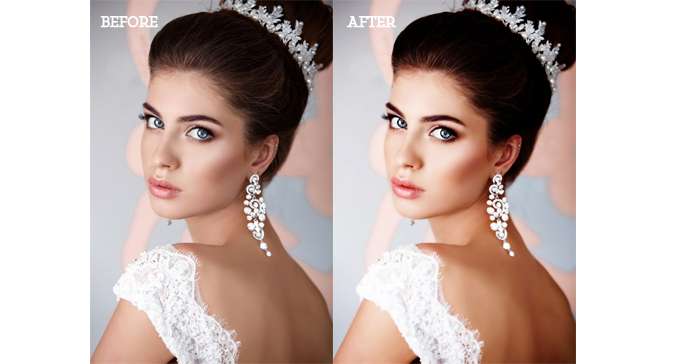
Here is the before and after image of the soft glow technique –
This is the final output of this trick. It may be a bit difficult for you first time but with practice you can develop as well. If you want bulk retouching then you can always outsource photo retouching service from experts like us.
