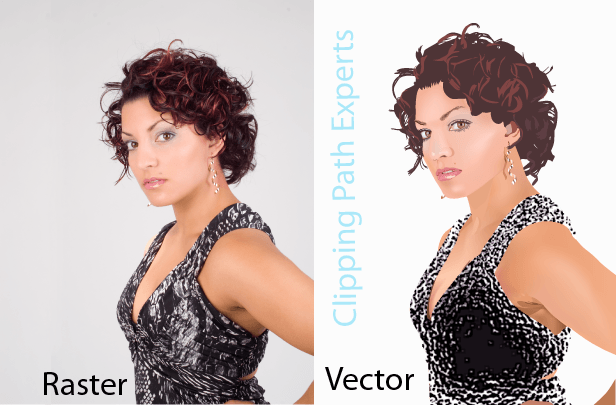
Raster to vector conversion is one of the toughest image editing services in this digital world. Since Raster images are created by pixels, vector images are created by mathematical signs. Raster images are usually unclear and the pixels break while zooming in the raster images. On the contrary, vector images are rather clear and more visible than raster images. But, raster images can be transformed into vector format by Adobe Photoshop and Adobe Illustrator
Though converting raster images into vector images is a bit tough, we will make it slightly easier for you by our simple 6 step process for converting your raster image to a vector file. These instructions are specific to Adobe CS5 but the functionality is pretty much the same for all the recent version of Adobe Creative Suite. Here I am discussing the 6 major steps below which will give you a proper vector conversion
1. Clean it Up In Photoshop
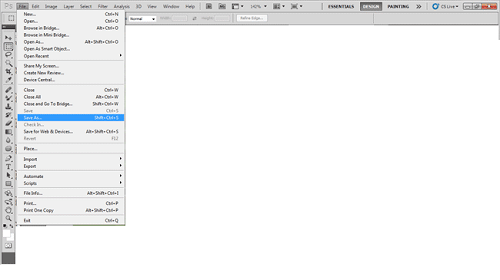
Before all the process, you need to do a little cleanup or enhance your photo depending on the size or resolution. To clean up or enhancing the photo, you need a simple process in Adobe Photoshop. You can change the size and enlarge if you find the photo too small. You can also clean up the image if you see any kind of unwanted spot or noise in the photo. After touching up and resizing on the photo, save the Photo in your drive as JPEG format. To save the image, go to File>Save as and select JPEG format and press enter or click OK.
2. Import Into Illustrator And Open Live Trace
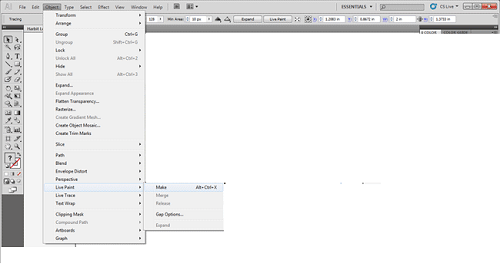
To start working in Illustrator, you need to select the image that you have saved and open it with Adobe Illustrator. Now, click on the selection tool after opening your desired image in Illustrator. After selecting the image, move the cursor up and click Object from the menu bar. Drop down will appear after clicking on the object. Scroll down to live trace to see the tracing option.
3. Set Tracing Options And Trace
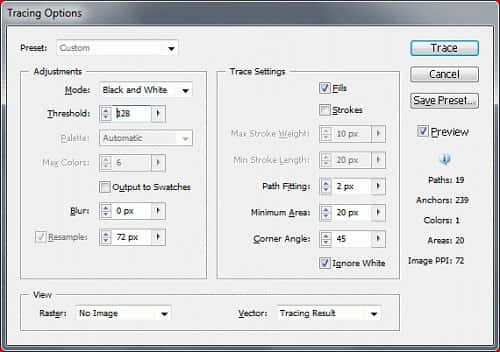
In the next step, you have to work on tracing. A new option will open after selecting Tracing Options from the menu. Once you select, a new box will open by which you will be able to set tracing options and preview the traced image. You have to adjust the selection for black and white or color properly along with other adjustment settings. You have to be very careful while putting the number of colors. Cause it creates a significant impact on the photo and on the clarity and crispness of the photo. To see the image preview in different colors and to see the clarity, you have to click on Preview. Just click on the Trace button once you get your desired color. That is how the tracing will be done.
4. Processed To Live Paint
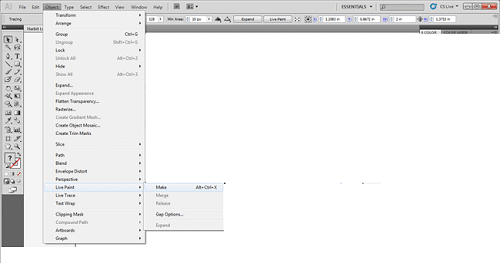
Live paint is a known tool to the people who do vector conversion service using Adobe Illustrator. Live paint is necessary in the case of making changes in vector paths or colors of the images. To do that, select the image using the selection tool and click on the Object on the menu bar. To expand the menu, just scroll down and hover over live paint. The dialogue box will appear like the image I have given below.
5. Delete Background Fill
Now, we will talk about background. The background is an important aspect in vector images. After done with Live Paint, the background color can be deleted and can be filled with another color. It is pretty easy to do by using Lasso tool. Select Lasso Tool and draw a circle around the object and make a selection. This will give highlight to your background which you are going to work on. After having the highlighted areas, click the delete button and you will see that the entire background has been deleted. You can choose any color you want to fill and repeat the process as much as you want.
6. Save File
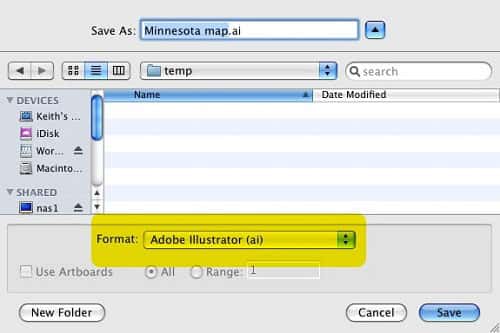
This is not the end of this process. As you have converted the image into a vector, you can edit the image. You can do re-size and edit color if you need. It can also be converted or saved in any format as per your requirement. Go to File>Save as and you will get a dialogue box. In the dialogue box, you will get options of the formats. Select any of the formats from below and click on OK to save it.
For vector conversion, Adobe Illustrator is the most powerful application. Making vector image is not easy if you do not know about the tools of Illustration. Vector images are the edited form of raster images which are converted from anchor points to mathematical format to increase the quality and the clarity of the images. The steps we have shown will make vector conversion easier if you follow the steps above.

