Your product photos are costing you money right now. Every hour they sit on your site with blown-out highlights, weird color casts, and amateur backgrounds, customers click away to competitors who figured this out years ago.
Here’s the brutal truth: 40% of Amazon returns happen because products don’t match photos. Not defective products. YOUR IMAGE lied to the customer.
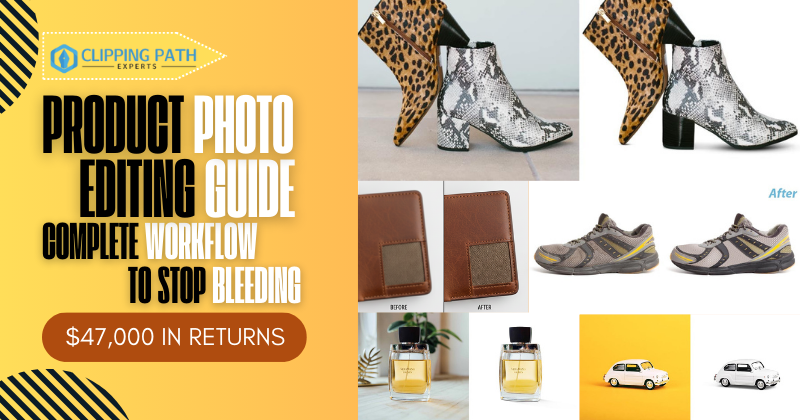
That’s $47,000 in returns for a mid-sized seller moving $200K annually. Gone. Because someone thought iPhone photos with bedroom backgrounds were “good enough.”
This product photo editing guide stops the financial bleeding and transforms images into conversion machines that accurately represent what customers receive.
What Is Product Photo Editing?
Product photo editing is the systematic enhancement of commercial images through technical correction, background manipulation, color accuracy, and detail refinement. Professional editors adjust exposure, correct white balance, remove backgrounds, enhance details, create shadows, and optimize file formats meeting platform specifications.

The balance between enhancement and authenticity prevents returns while maximizing visual appeal. This isn’t Instagram filters—it’s surgical precision in visual communication.
How It Differs from Regular Photo Editing
Portrait photographers enhance skin and adjust mood. Product photographers eliminate variables and standardize presentation. The distinction matters because creative freedom in product photography generates returns. This product photo editing guide prioritizes accuracy over artistry.
Why Product Photo Editing Matters for Your Business
Professional product photo editing delivers measurable financial outcomes. Research demonstrates edited visuals increase click-through rates by 22-40% compared to unedited alternatives.
The Direct Revenue Impact
Retailers using consistent, professionally edited catalogs experience return rate reductions of 15-25%. Calculate your current return rate against gross revenue. A 20% reduction in returns for a $500K annual business saves $40,000 directly to bottom line.

The correlation between image quality and average order value proves significant. Retailers maintaining visual consistency see average order value increases of 8-12%. Customers perceive uniform presentation as professional credibility, encouraging larger purchases.
What Unedited Photos Cost You
Immediate costs: Lower click-through rates reducing traffic value, abandoned carts from unclear representation, price sensitivity from perceived low quality, lost mobile conversions from oversized files.
Downstream costs: Return processing and reverse logistics, customer service inquiries about appearance, negative reviews mentioning image inaccuracy, lost repeat purchases from disappointed customers.
Every unedited product photo actively damages profitability. Professional presentation builds confidence. Customers viewing consistent, accurate imagery trust product quality extends beyond visuals.
Types of Product Photo Editing and When to Use Each
Different products require different editing approaches. Understanding when to apply specific techniques maximizes results while preventing over-editing that generates returns.
Background Removal

Isolates products from environments creating clean presentations. Use for all marketplace listings requiring white backgrounds (Amazon, eBay, Walmart) and multi-platform distribution. Master <background editing> techniques for complex edges and transparent materials.
Color Correction

Neutralizes lighting color casts revealing accurate product hues. Critical for apparel, cosmetics, home décor, and accessories where color affects purchase decisions. Professional <color correction> prevents the customer disappointment that drives returns.
Exposure Adjustment

<Exposure correction> balances underexposed and overexposed regions revealing product details. Apply to products requiring dimensional appearance through proper shadow and highlight definition.
Detail Enhancement

<Product sharpening> and <texture enhancement> reveal material characteristics. Essential for textured products where quality differentiates from competitors—leather goods, textiles, artisan products.
Shadow Creation

<Shadow editing> grounds products in spatial context preventing floating appearance. Use for products requiring dimensional presentation or luxury positioning.
Product Retouching

<Product retouching> removes manufacturing marks and environmental contamination while preserving authenticity. Apply to all products benefiting from dust removal while maintaining authentic material characteristics.
Batch Processing

<Editing automation> applies consistent adjustments across image sets. Batch processing saves 60-70% editing time for large catalogs requiring standardized treatment.
The 5 Step Product Photo Editing Workflow
Effective product photo editing follows systematic workflows ensuring consistent quality while maximizing efficiency.

Effective product photo editing follows systematic workflows ensuring consistent quality while maximizing efficiency. This comprehensive product photo editing process addresses every technical requirement from background isolation through final export optimization. Professional product photo editing requires mastering each sequential stage building upon previous corrections for optimal results.
Step 1: Background Isolation
Background removal represents the foundation of professional product photo editing. Amazon, eBay, and Walmart mandate pure white backgrounds with RGB values of 255, 255, 255. This critical step isolates products from surrounding environments meeting marketplace requirements while maintaining edge quality.
Three approaches based on product complexity:
Simple products with clean edges require clipping path techniques using Pen Tool for surgical precision. This method produces mathematically perfect selections ideal for electronics, furniture, books, and geometric items. The vector-based approach preserves edges without quality loss enabling future adjustments.
Moderately complex products combine AI-powered Quick Selection with manual Pen Tool refinement. Photoshop’s intelligent edge detection handles bulk selection while manual paths correct problem areas. This hybrid workflow balances speed with accuracy for products featuring mixed edge types.
Complex products with intricate edges demand specialized techniques for hair, fabric, fur, and transparent materials. Select and Mask with AI detection handles approximately 80% automatically. Refine Edge Brush completes challenging areas with precision control over edge softness and detection radius.
Pure white backgrounds require RGB verification at 255, 255, 255 using Eyedropper and Info panel. Color profile conversion to sRGB prevents white value shifts during export. Master complete <background cleanup> methods including advanced selection refinement, edge decontamination, and transparent PNG workflows for multi-channel deployment.
Step 2: Exposure and Color Correction
Color accuracy separates professional product photo editing from amateur work. <White balance correction> neutralizes color casts revealing accurate product appearance preventing the customer disappointment driving returns. Fluorescent lights create green-cyan tints while tungsten bulbs add orange-yellow casts. Proper <color temperature correction> establishes the foundation for all subsequent product photo editing work.
White balance correction workflow:
Camera Raw Filter provides comprehensive color temperature control for RAW files and JPEG images. The White Balance Tool samples neutral gray areas automatically adjusting Temperature and Tint sliders. Manual Temperature adjustment (-100 to +100 range) removes blue or yellow casts while Tint correction eliminates green or magenta shifts. Alternative Curves adjustment layer method uses gray point eyedropper for automatic RGB curve balancing.
Exposure correction techniques:
Levels adjustment layers analyze histogram distribution establishing accurate black and white points. Optimal histograms span the full tonal range without clipping extremes that lose detail. Curves adjustments provide precise control over highlights, midtones, and shadows independently. Subtle S-curve application (highlights up, shadows down) enhances contrast without compromising tonal integrity. Advanced <exposure balancing> reveals product details across full tonal range crucial for effective product photo editing.
Color matching for consistency:
Color Sampler Tool tracks up to four reference points displaying RGB or LAB values in Info panel. Hue/Saturation adjustments target specific color ranges (Reds, Yellows, Greens, Cyans, Blues, Magentas) controlling hue, saturation, and lightness independently. Selective Color adjustment layers provide precise control over CMYK composition using Relative or Absolute methods. Professional <product color matching> requires documenting exact RGB or LAB values ensuring consistency customers recognize across product variants—cornerstone of professional product photo editing workflows.
Step 3: Detail Enhancement
The goal of product photo editing at this stage is revealing existing detail without manufacturing fake texture. Professional <sharpening techniques> increase edge contrast without amplifying noise or creating halos—distinguishing expert product photo editing from amateur attempts.
Multiple sharpening approaches:
High Pass sharpening creates duplicate layers applying High Pass filter (1.0-1.5 pixel radius) set to Overlay blend mode at 40-60% opacity. This increases edge contrast without affecting color or smooth areas. Black layer masks enable selective application targeting product edges, text, and textured surfaces while preserving smooth zones.
Unsharp Mask provides Amount (80-120%), Radius (0.5-1.5 pixels), and Threshold (3-8 levels) controls preventing smooth area sharpening that amplifies noise. Smart Object conversion enables non-destructive editing with adjustable Smart Filters. This proves essential for efficient product photo editing workflows requiring iterative refinement.
Clarity and Texture adjustments in Camera Raw Filter enhance material characteristics through localized contrast. Clarity increases (+20 to +40) reveal three-dimensional form while Texture slider (+10 to +30) specifically enhances fine detail in fabric weave, wood grain, and embossed patterns. Black layer masks localize enhancement preventing artificial appearance on smooth surfaces.
Advanced techniques:
Frequency Separation splits images into separate texture and color/tone layers enabling independent manipulation. This advanced product photo editing technique removes color stains without affecting texture or smooths tones without eliminating detail. Micro-contrast enhancement through targeted Curves adjustments increases three-dimensional appearance without affecting overall exposure.
<Detail enhancement> provides visual information replacing physical examination. Visible stitching quality, material weave, and surface finish communicate value justifying price points. Master complete <sharpening techniques> including Smart Sharpen for motion blur correction and category-specific settings optimized for different product materials.
Step 4: Shadow and Reflection Creation
Realistic <shadow creation> grounds products in spatial context preventing the floating appearance undermining professional presentation. Shadows require two components working together—contact shadows and cast shadows—each serving distinct visual purposes.
Shadow workflow overview:
Contact shadows appear directly beneath products where they touch surfaces. These hard-edged shadows at 70-80% opacity anchor products preventing floating appearance. Shadow color matches ambient light temperature—dark warm gray (RGB 20, 15, 10) for warm lighting or dark cool gray (RGB 10, 15, 20) for cool setups—never pure black.
Cast shadows extend away from products showing light source distance and direction. These soft-edged shadows fade gradually from 40-60% opacity near products to 0% at edges. Gaussian Blur (8-15 pixels) creates natural softness while gradient masks produce realistic fade patterns. Shadow angle and intensity must remain consistent across all catalog products maintaining professional standards.
Alternative layer style approach:
Drop Shadow layer effects provide rapid shadow creation with Multiply blend mode, adjustable opacity (60-80%), and controllable angle, distance, spread, and size parameters. Converting layer styles to independent layers enables additional Free Transform and masking refinement. Professional <shadow techniques> create natural dimensional appearance distinguishing premium editing from amateur work.
Reflection creation for premium positioning:
Glossy surface reflections communicate premium quality and material characteristics. Vertical flip transformation positions duplicated product layers below originals at 20-40% opacity. Gradient masks fade reflections from contact points while Motion Blur (2-4 pixels vertical) matches realistic surface characteristics. Perspective distortion for angled products creates trapezoidal shapes matching surface angle.
Master complete <reflection editing> techniques including color-matched shadow tinting, consistency documentation, and material-specific approaches creating the dimensional context customers use for quality assessment.
Step 5: Format Optimization and Export
Page speed directly impacts conversion rates with file optimization preventing 3-5% bounce rate increases from slow loading. This final product photo editing stage ensures images meet technical specifications while maintaining visual quality for marketplace deployment.
Color space and resolution management:
Convert images to sRGB IEC61966-2.1 color profile—universal standard for web display—preventing oversaturation when browsers interpret Adobe RGB or ProPhoto RGB working spaces. Critical consideration in product photo editing for web deployment. Verify minimum resolution requirements: 1000×1000 pixels for zoom functionality, 2000×2000 or 3000×3000 pixels for premium retailers. Follow platform-specific <image sizing> and <cropping standards> ensuring uniform framing across catalogs.
Export format selection:
WebP format reduces file sizes by 25-35% compared to JPEG while maintaining equivalent quality—preferred format for modern product photo editing workflows. Quality settings between 75-85% balance file size with visual fidelity. Enable transparency for images requiring multi-background applications.
JPEG export provides universal compatibility at 85-90% quality settings balancing visual quality with file size constraints. Save for Web (Legacy) offers maximum compression with side-by-side preview enabling quality optimization. Keep files under 500KB for main product images, under 150KB for grid thumbnails.
PNG export suits images requiring alpha channel transparency for multi-background applications despite 2-3x larger file sizes. Choose 8-bit for smaller files (256 colors) or 24-bit for full color photographs with transparency.
Workflow automation:
Actions recorded in Photoshop automate repetitive export sequences applying consistent settings across image batches. Essential automation for scaling product photo editing operations. Batch processing through File > Automate > Batch processes entire folders automatically. This systematic approach completes the comprehensive product photo editing workflow delivering marketplace-ready images meeting technical specifications while maintaining visual quality standards. Press I for Eyedropper Tool
- Click background area
- Press F8 for Info panel
- Verify RGB values read 255, 255, 255 for white backgrounds
- Press Ctrl/Cmd + Alt/Option + I to check file size under 500KB target
Quality verification:
- Go to Image > Image Size to verify pixel dimensions meet marketplace minimums
- Zoom to 100% viewing actual pixel quality
- Check for:
- Excessive compression artifacts
- Edge halos
- Color banding
- Detail loss
Device testing:
- Test files on actual devices:
- iPhone
- Android phone
- Desktop browsers
- Verify appearance matches edited version
- Color shifts, brightness changes, or detail loss indicate export setting problems requiring adjustment
- This final quality check completes the comprehensive product photo editing workflow delivering marketplace-ready images
Equipment and Software Requirements
Essential Hardware
Minimum viable setup:
- Computer: 16GB RAM, dedicated GPU
- Monitor: Color-calibrated IPS with 99% sRGB coverage
- Calibration tool: X-Rite ColorMunki
- Graphics tablet: Wacom Intuos ($80+)
The color-calibrated monitor is non-negotiable. Editing on uncalibrated displays produces inconsistent results.
Software Options by Budget
Professional operations: Adobe Photoshop ($54.99/month) offers action recording and batch processing saving hundreds of hours annually.
Photographers: Capture One ($15/month or $300 one-time) provides superior color grading tools.
Budget-conscious: Affinity Photo ($69.99 one-time) offers 90% of Photoshop functionality without subscriptions.
Minimal budget: GIMP (free, open-source) handles basic catalog work with steeper learning curve.
Marketplace-Specific Requirements
Each platform specifies unique technical requirements. Violating standards results in listing suppression.
| Platform | Min Resolution | Background | Format | Notes |
|---|---|---|---|---|
| Amazon | 1000×1000px | Pure white (255,255,255) | JPEG/PNG | Products fill 85% of frame |
| eBay | 500×500px | White/light gray | JPEG/PNG | Square aspect ratio optimal |
| Etsy | 2000×2000px | Any (lifestyle encouraged) | JPEG/PNG | First image critical for search |
| Walmart | 2000×2000px | Pure white (255,255,255) | JPEG | Similar to Amazon |
| 1080×1080px | Any | JPEG/PNG | 4:5 ratio maximizes feed space |
Plan compositions with safe zones accommodating multiple aspect ratios. Keep critical elements within central 70% of frame area.
Outsourcing vs In-House Product Photo Editing
Deciding between outsourcing and building internal capabilities requires analyzing volume, quality requirements, and resources.
When Outsourcing Makes Sense
Advantages: No equipment investment, immediate specialized expertise access, scalability during seasonal peaks, predictable per-image costs.
Ideal for: Startups without capital, seasonal businesses with fluctuating volume, companies testing ecommerce, organizations lacking technical talent.
Professional ecommerce photo editing services handle everything from basic background removal to complex retouching, delivering consistent quality without internal overhead.
When In-House Works Better
Advantages: Complete quality and timeline control, no per-image costs after initial investment, immediate iteration capability, proprietary process development.
Ideal for: Large catalogs requiring continuous editing, products needing frequent updates, companies with existing photography operations, organizations prioritizing speed over cost.
Hybrid Approach
Many successful operations handle basic editing internally while outsourcing complex retouching or overflow volume. This balances control with flexibility.
Cost Breakdown
Outsourcing Costs
Per-image pricing:
- Basic background removal: $0.50-$2.00
- Color correction: $1.50-$5.00
- Advanced retouching: $5.00-$15.00
- Complex compositing: $15.00-$50.00
Volume discounts reduce per-image costs 30-50% for 1,000+ image projects
Clipping path experts’ pricing starts from $0.35 per image. For more information, check out our pricing
In-House Investment
Initial: $4,000-$10,000 (computer, monitor, software, training)
Ongoing: $15-$45 per hour labor plus $55-$100 monthly software
Break-even: Most operations reach profitability within 6-12 months if editing volume exceeds 500 images monthly.

Product Photo Editing Quality Checklist
Use this checklist before approving any edited image:
Pre-Editing
- ☐ Focus sharpness verified at 100% magnification
- ☐ Exposure histogram shows full range without clipping
- ☐ White balance appears neutral
- ☐ Composition meets platform requirements
During Editing
- ☐ Background achieves pure white (RGB 255, 255, 255)
- ☐ Selection edges clean without halos
- ☐ Color accuracy verified against physical product
- ☐ Sharpening enhances without artifacts
- ☐ Shadows appear natural with consistent direction
Final Approval
- ☐ Zoom to 100%—no missed defects using <photo cleanup> methods
- ☐ File size meets platform limits
- ☐ Resolution meets minimum requirements
- ☐ Format correct for intended platform
- ☐ Tested on mobile devices
- ☐ <Image consistency> maintained across catalog
Critical Mistakes to Avoid
Mistake #1: Inconsistent Catalog Presentation
Different shadow angles, varying color temperatures, and mixed product sizing signal unprofessional operations.

Prevention: Create comprehensive style guides with reference images. Train all editors using identical standards maintaining <catalog consistency> across thousands of SKUs.
Mistake #2: Over-Retouching Products
Excessive smoothing removes texture. Unrealistic saturation creates impossible expectations. Over-edited products generate 25-35% higher returns when physical items differ.

Prevention: Establish guidelines specifying removable versus preserved characteristics. Remove temporary defects like dust. Preserve authentic material properties.
Mistake #3: Ignoring Mobile Optimization
Desktop-optimized images fail on mobile devices generating 60-70% of ecommerce traffic. Large files destroy mobile experience.

Prevention: Test every image on actual mobile devices. Verify file sizes load quickly on cellular connections.
Mistake #4: Incorrect Color Space
Editing in Adobe RGB produces oversaturated colors when converted to sRGB for web display.

Prevention: Work in sRGB color space from initial import preventing color shifts during export.
Mistake #5: Poor File Organization
Confusion in catalogs containing thousands of products wastes time and delays deliveries.

Prevention: Implement hierarchical folder structures. Use consistent SKU-based naming. Maintain separate folders for raw, work-in-progress, and final files.
Advanced Product Photo Editing Techniques
Frequency Separation

Splits images into separate texture and color/tone layers, enabling independent manipulation. Remove color stains without affecting texture. Smooth tonal transitions without eliminating detail.
Focus Stacking

Combines multiple images shot at different focus distances creating edge-to-edge sharpness impossible from single exposures. Essential for jewelry, small electronics, and intricate products.
<Lens Correction>

Apply <lens correction> profiles matching specific camera and lens combinations removing barrel distortion, chromatic aberration, and vignetting. Products with straight edges require precise correction for professional results.
<Noise Reduction>

High-ISO photography or underexposed captures brightened during editing display digital noise. Professional <noise reduction> improves image quality by eliminating random pixel color and brightness variations particularly visible in shadow areas. Apply luminance noise reduction at 30-50% strength while preserving detail.
Advanced <Background Cleanup>

Complex products with intricate edges demand specialized selection using Refine Edge tools. Adjust detection radius (5-15 pixels), smooth (3-5), feather (0.3-0.5 pixels), and contrast (10-20%) until achieving clean edges.
<Color Presets>

Develop <color presets> matching brand guidelines for consistent color treatment, contrast, and mood across catalogs. Apply presets to entire image batches establishing baseline appearance before manual refinement. Update seasonally reflecting evolving aesthetic preferences.
When to Hire a Product Photo Editing Agency
Scenario #1: Rapid Catalog Launch
New ecommerce businesses needing 500+ products edited within weeks lack time for hiring and training. Professional agencies deliver consistent quality immediately.
Scenario #2: Specialized Technical Requirements
Products requiring focus stacking, complex compositing, or intricate retouching benefit from specialists with specific expertise. Building internal capability for occasional specialized needs proves inefficient.
Scenario #3: Seasonal Volume Fluctuation
Holiday seasons generate 3-5x normal editing volume. Agencies scale capacity without internal management burden.
Scenario #4: Quality Inconsistency
Internal editors producing inconsistent results damage catalog presentation. Agencies maintain systematic quality control, delivering uniform output.
Evaluating Agencies
Request test edits on actual products before committing. Evaluate technical quality, communication responsiveness, and deadline adherence. Verify portfolio demonstrates relevant product category experience.
Need professional implementation? Expert ecommerce photo editing services deliver the systematic quality your catalog demands.
FAQs About Product Photo Editing
How much does professional product photo editing cost?
Professional editing costs $0.50-$50 per image depending on complexity. Basic background removal costs $0.50-$2.00. Advanced retouching requiring 30+ minutes runs $15-$50. Calculate ROI against current return rates—prevented returns justify editing costs immediately.
What resolution do ecommerce product images need?
Minimum resolution reaches 1000×1000 pixels enabling zoom functionality. Premium retailers provide 2000×2000 or 3000×3000 pixels for detailed examination. Higher resolutions increase purchase confidence.
Should I outsource or build in-house capability?
Outsource if editing fewer than 500 images monthly or lacking technical talent. Build in-house for catalogs requiring continuous editing or frequent updates. Many operations use hybrid approaches.
How does product photo editing reduce returns?
Professional editing ensures accurate color representation, proper exposure, and consistent presentation. 40% of returns relate to image misrepresentation—accurate imagery prevents costly returns.
What file format works best for ecommerce?
WebP reduces file sizes 25-35% versus JPEG maintaining equivalent quality. Keep files under 500KB for optimal page speed. Use JPEG for universal compatibility when WebP isn’t supported.
What causes over-edited product photos?
Excessive smoothing eliminating texture, unrealistic color saturation, and removed authentic characteristics create artificial appearance triggering higher returns when products arrive looking different.
Final Action Plan: Implementing Your Product Photo Editing Guide
Professional product photo editing isn’t optional—it’s the minimum competitive standard for ecommerce success.
Retailers winning your customers understand consistent visual quality increases average order value 8-12%. They know professional presentation reduces returns 15-25%.
Your immediate steps:
- Audit current catalog identifying inconsistencies
- Calculate return rate costs attributable to image issues
- Decide between internal capabilities or outsourcing
- Establish quality standards and reference guidelines
- Implement systematic workflows ensuring consistency
- Measure results tracking CTR, conversion rates, and returns
The question isn’t whether this product photo editing guide matters. The question is how much longer you’ll lose sales to competitors who figured this out already.
Start with one product category. Apply systematic workflow. Measure results. Scale what works.
Your current product photos are either making money or costing money. There’s no middle ground.


